


But look how cool it looks! So I thought, what if I could just do this
without making my own lip balm? I am not Martha Stewart. If anything,
the only thing I have in common with her is that I too will probably end
up in prison one day. But I had this sick lion locket from Forever 21
and I wanted to try it.

I learned two things: yes, you can do this with your own lip balm, and
it is fucking messy. Since Beautylish is a professional site, they made
it look like it was not. But it is. So just make sure that you do this
project with a crap ton of newspaper underneath your workspace.
Also,
they got the lipbalm down to a liquid on the stove top, but I found that
to be kind of messy, hard to control, and found that the balm started
to solidify before I could get it all in the locket. So here is a
slightly modified version.
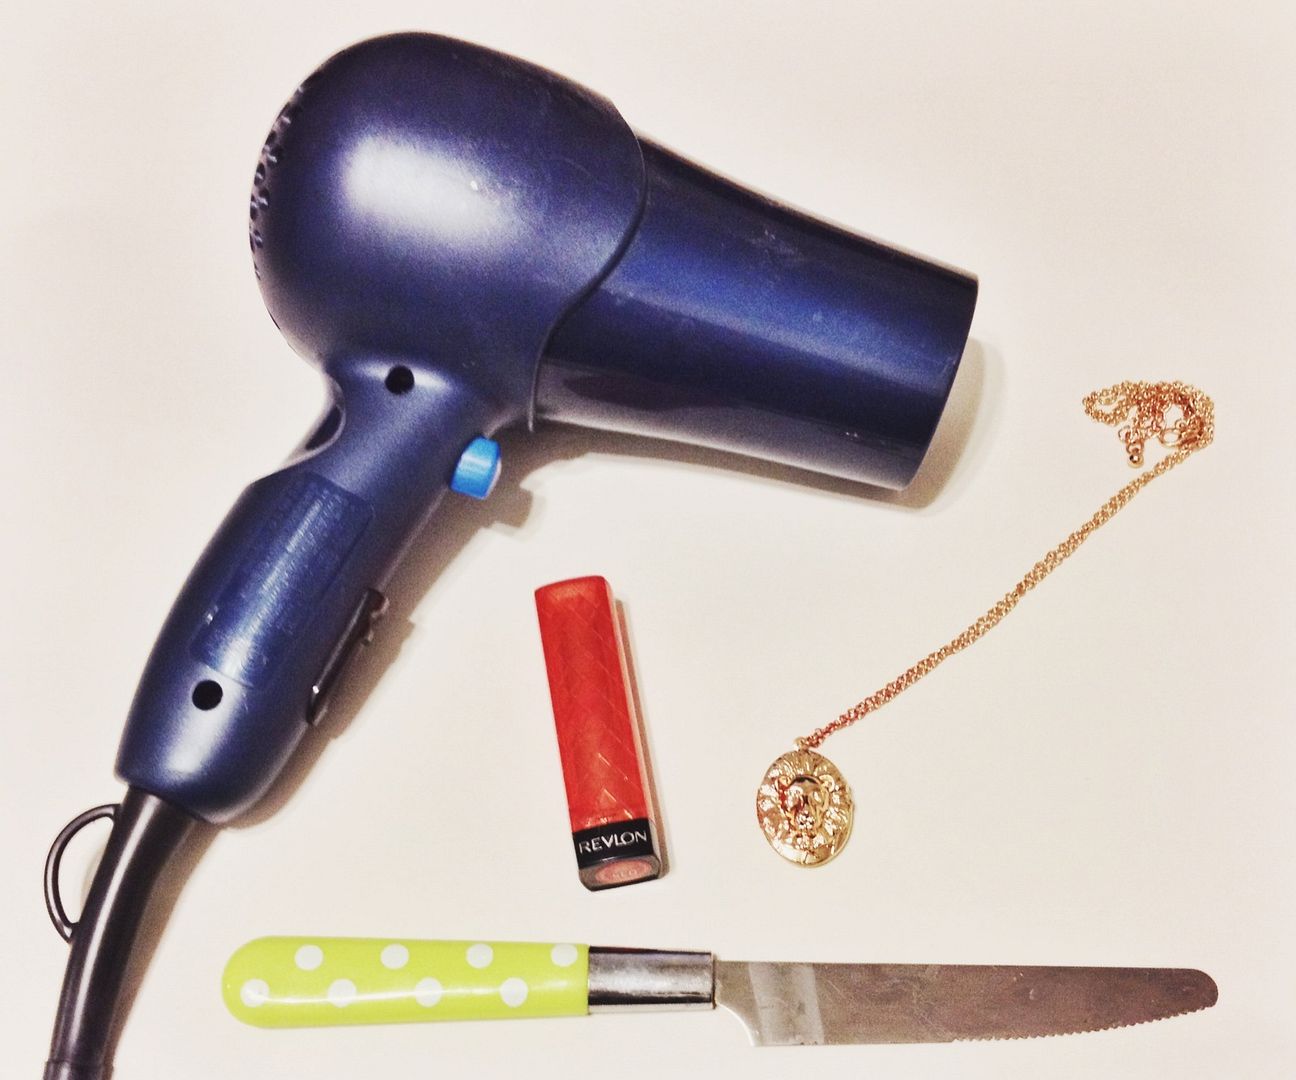
You will need:
Locket
Balm (I used a lip butter that was on its last leg / I couldn't find my Burts Bees)
Knife
Hair dryer
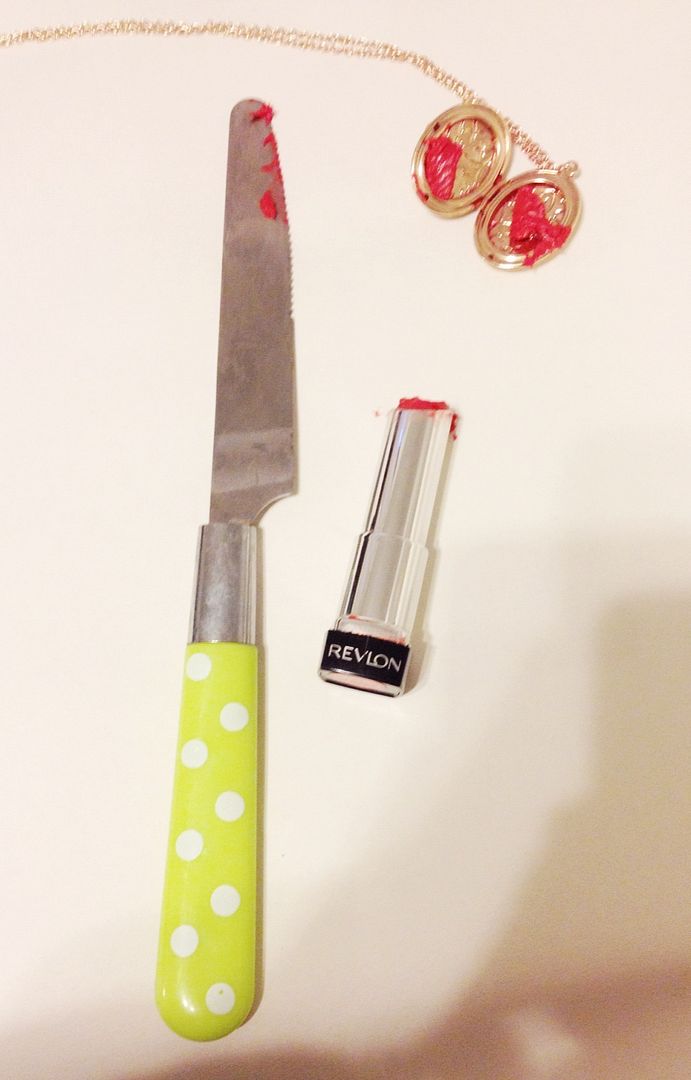
Slice a piece of lip balm off and put it in your locket. How much you
need will vary based on the size of your locket, but I found luck erring
on the side of using a little too much. Also, please enjoy these
professional iPhone photos I took at 2am. When inspiration strikes, it
might be at weird times, and times when your dslr battery is dead.
With the blow dryer on low heat, hold it over the balm in the locket and
watch it melt! It will splash a little (but trust me, its still less
mess than when I tried it on the stove top), which is why the newspaper
is there. You may need to add a little more at a time to get a full
locket.

So it's not freakishly smooth like the Beautylish one, but it gets the job done, and makes a little more room in your makeup bag.
No comments:
Post a Comment