Thursday, January 26, 2017

Copycat Taco Bell Mexican Pizza

Reblogged from: Baking Beauty

Copycat Taco Bell Mexican Pizza: Crunchy tortillas stuffed with flavorful beans/beef and topped with melty cheese. Tasty and healthier than the drive thru!

Copycat Taco Bell Mexican Pizza

I heart Taco Bell! Authentic Mexican cuisine? Not so much! Delicious and cheap? Yes and yup!
However, our closest one is around ~20+ minutes away. Hardly a quick place to go for supper.

One of my favorite things to get at Taco Bell is their Mexican Pizza. It’s not a true pizza, but rather 2 crispy tortillas filled with beans, meat, sauce, and of course, lots of melty cheese.
Learn how to whip up a Copycat Taco Bell Mexican Pizza that tastes better and is way healthier! It’s also super customizable. Vegetarian? Leave out the meat and use vegetarian refried beans.

Like it hot? Add some hot salsa or jalapeƱos!

If you don’t want to fry your own tortillas try buying pre-made tostada shells from the grocery store.

Copycat Taco Bell Mexican Pizza – Easy and Delicious

Recipe type: Main Dish
Prep time: 
Cook time: 
Total time: 
Serves: 4 Mexican Pizzas


Ingredients
  • ½ Pound Ground Beef
  • ½ Package Taco Seasoning Mix
  • 2 Tablespoons Water
  • 8 White Corn Tortillas
  • 16 Ounces Refried Beans
  • ⅓ Cup Enchilada Sauce
  • ⅓ Cup Salsa
  • 1 Cup Shredded Cheddar Cheese
  • 1 Cup Shredded Monterey Jack Cheese
  • ¼ Cup Diced Tomatoes
  • ¼ Cup Sliced Green Onions (if desired)
  • ¼ Cup Sliced Black Olives (if desired)
  • Vegetable Oil for Frying
Instructions
  1. Brown ground beef in a skillet. Drain excess fat. Stir in water and taco seasoning.
  2. Simmer for 7-10 minutes or until water is absorbed. Remove from heat.
  3. In a large pot, heat oil to 375 degrees. Fry each tortilla for 30-45 seconds on each side or until golden brown. Drain on paper towels.
  4. Preheat oven to 400 degrees F.
  5. Spread each tortilla with ~1-2 tablespoons of refried beans. Top beans with ground meat.
  6. Top with second tortilla. Spread the top of the second tortilla with enchilada sauce and salsa.
  7. Evenly sprinkle with cheeses, tomatoes, olives, and green onion.
  8. Bake for 5-7 minutes or until the cheese is melted.

Twix Cheesecake


Reblogged from: Hugsandcookiesxoxo

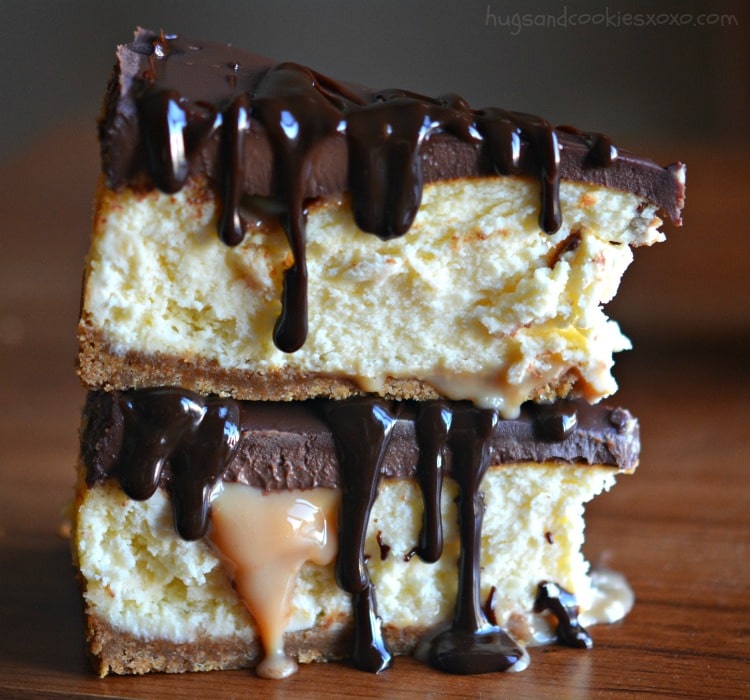
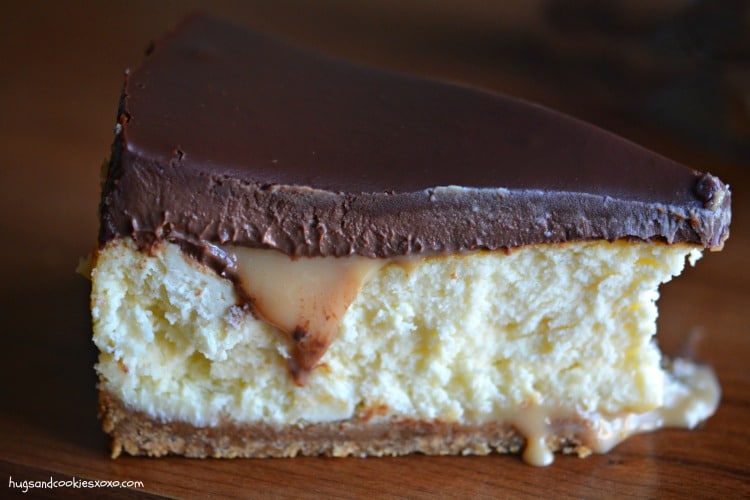
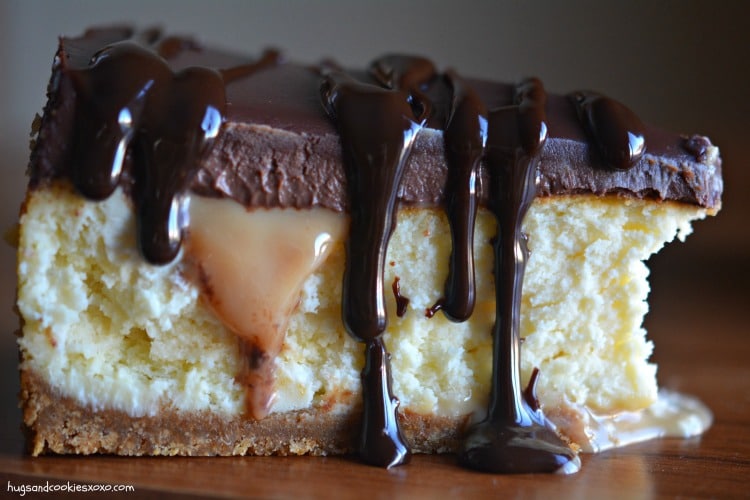
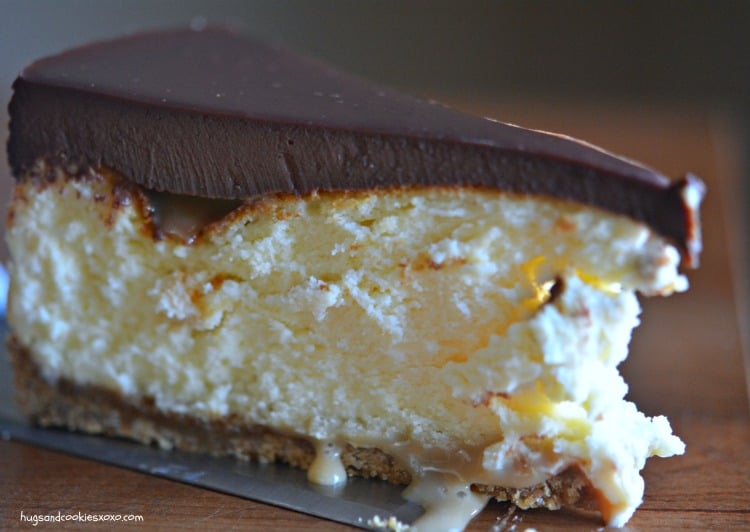
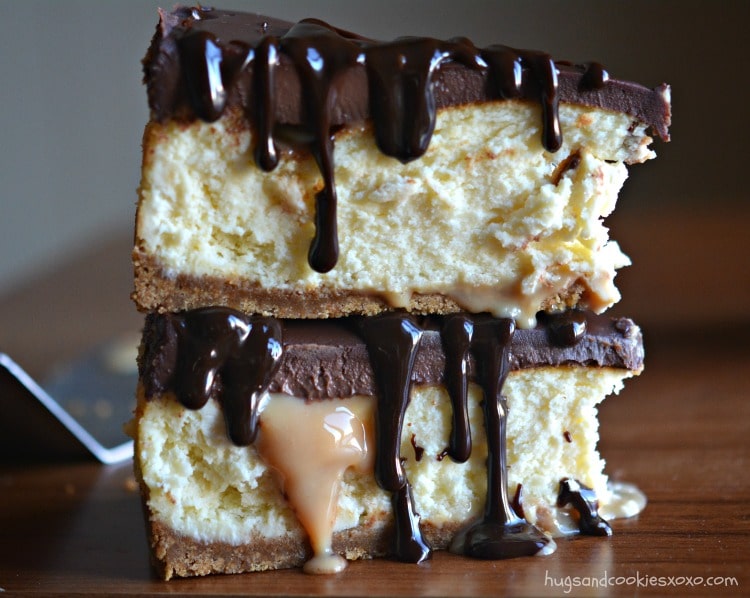
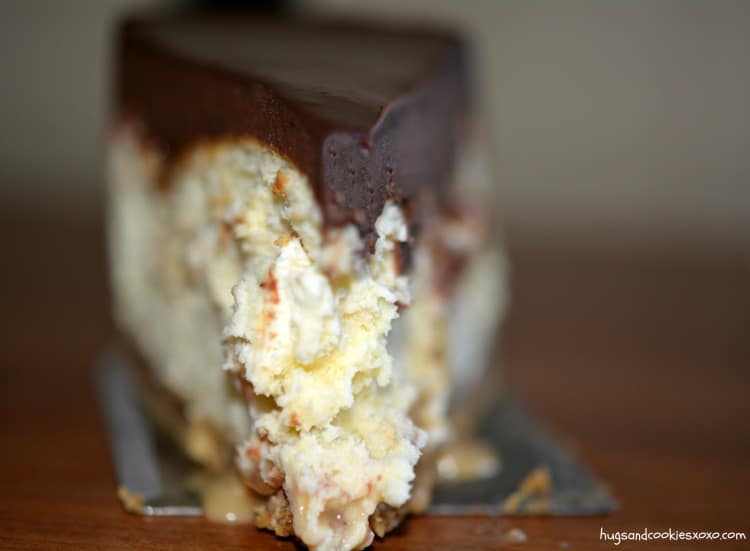
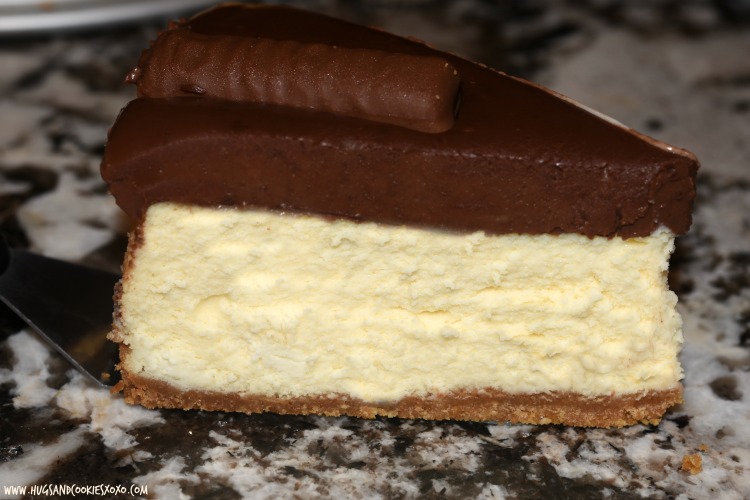
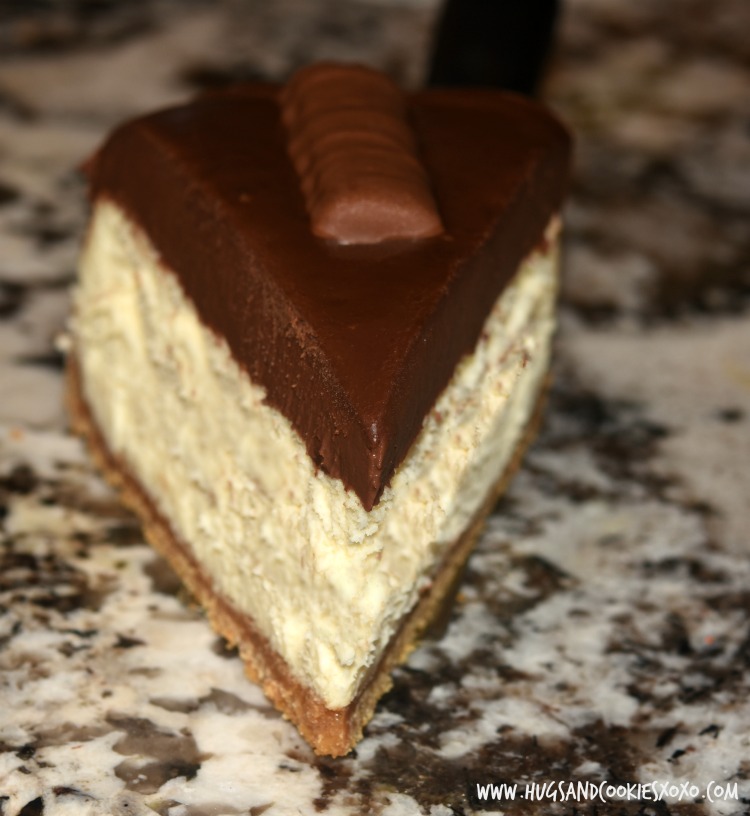
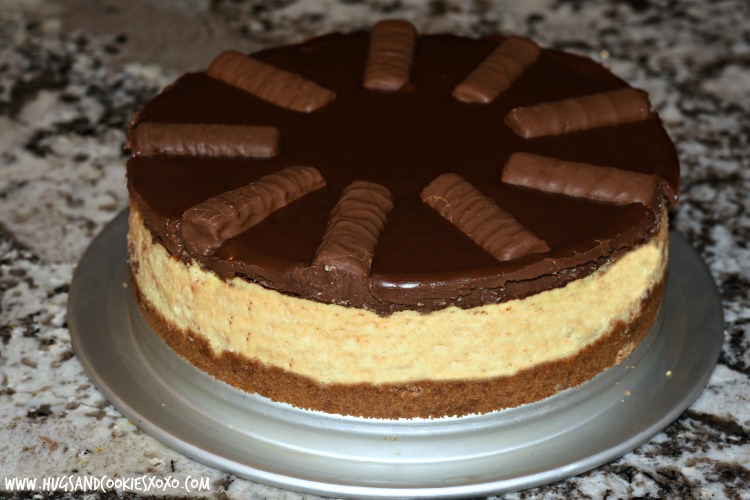
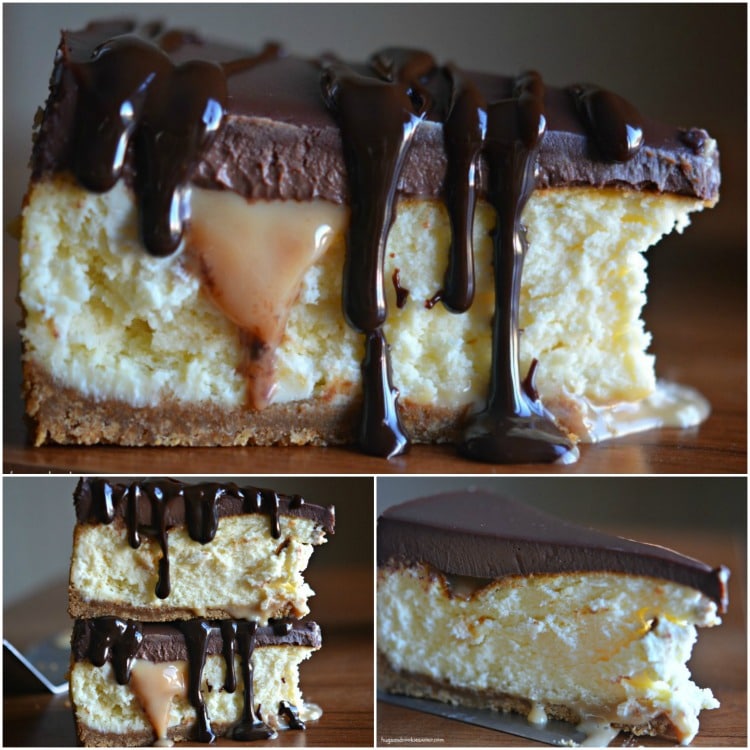
Love Twix Candy Bars? Then this is the cheesecake for you! It starts with the best cheesecake recipe, like ever!  It has a crunchy graham cracker crust. It is topped with an ooey gooey rich layer of 3 minute caramel and a thick chocolate ganache layer. Clearly, this one is not a diet cake! LOL  But, it is perfect for any and every special occasion you will celebrate!  Add some whipped cream when serving and your guests will be loving you up!

cheescake caramel
cheesecake caramel cheesecake hot fudge cheesecake slice
cheesecake slices hot fudge cheesecake

You’ll Need:

9 Inch Spring form Pan
Cheesecake Moat
Large Cake Knife 
 
 
Ingredients
Crust:
  • 1 1 /2 c. graham cracker crumbs
  • 1 T sugar
  • 6 T melted butter
Cheesecake:
  • Four 8-ounce packages PHILADELPHIA cream cheese, at room temperature
  • 1⅔ cups sugar
  • ¼ cup cornstarch
  • 1 tablespoon pure vanilla extract
  • 2 extra-large eggs
  • ¾ cup heavy whipping cream
Instructions
Crust:
  1. Combine all ingredients and press into a 9 inch spring form pan.
  2. Bake at 350 for 8 minutes. Let cool.
Cheesecake:
  1. In a large bowl, using an electric mixer fitted with the paddle attachment, beat 1 package of the cream cheese, ⅓ cup of the sugar, and the cornstarch together on low until creamy, about 3 minutes, scraping down the bowl several times.
  2. Blend in the remaining cream cheese, one package at a time, beating well and scraping down the bowl after each.
  3. Increase the mixer speed to medium and beat in the remaining sugar, then the vanilla.
  4. Blend in the eggs, one at a time, beating well after each.
  5. Beat in the cream just until completely blended.
  6. The filling will look light, creamy, airy, and almost like billowy clouds. Be careful not to over-mix! Gently spoon the batter over the crust. Wrap the sides of the pan in aluminum foil.
  7. Place the cake pan in a large shallow pan containing hot water that comes halfway (about 1 inch) up the side of the spring form. Bake until the edge is light golden brown, the top is light gold, and the center barely jiggles, about 1¼ hours. If the cake still feels soft around the edge, let it bake for 10 minutes more (the cooking time will be about the same for both the 8- and 9-inch cheesecakes). Remove the cheesecake from the water bath, transfer to a wire rack, and let cool for 2 hours. Chill until cold.
  8. Cheesecake recipe adapted from Junior's
3 Minute Caramel
 
Ingredients
  • 40 Kraft Caramels, unwrapped of course!
  • 1 can sweetened condensed milk
  • 5 Tablespoons butter
Instructions
  1. Combine all in a heat proof bowl and microwave in 1 minute intervals until completely smooth and blended. Stir after each minute.
  2. Let cool a bit.
  3. I used half for the cheesecake and poured the other half into a mason jar for other uses.
  4. (Think ice cream topping, poured over brownies, etc!)

Ganache
 
Ingredients
  • 2 cups heavy cream
  • 12 ounces Ghirardelli semi sweet chocolate bars (not chips)
Instructions
  1. Heat the cream just to a boil and pour over the chocolate in a heat proof bowl.
  2. Lets it 2 minutes.
  3. Stir until all the chocolate is melted!

Twix Cheesecake Assembly
 
Instructions
  1. Keep the cheesecake in the spring form pan and make sure it is chilled.
  2. Pour about half the caramel into the center where the center has deflated down a bit.
  3. Chill just to firm up the caramel.
  4. Pour on the chocolate ganache and chill several hours or overnight.
  5. To serve, carefully remove the spring form pan sides.
  6. Cut into slices!
  7. Top with hot fudge if desired!
  8. NOTE-the caramel will ooze out a bit when sliced! If storing in the fridge, place slices on a large plate to catch any extra caramel.
  9. Serve with whipped cream if desired!

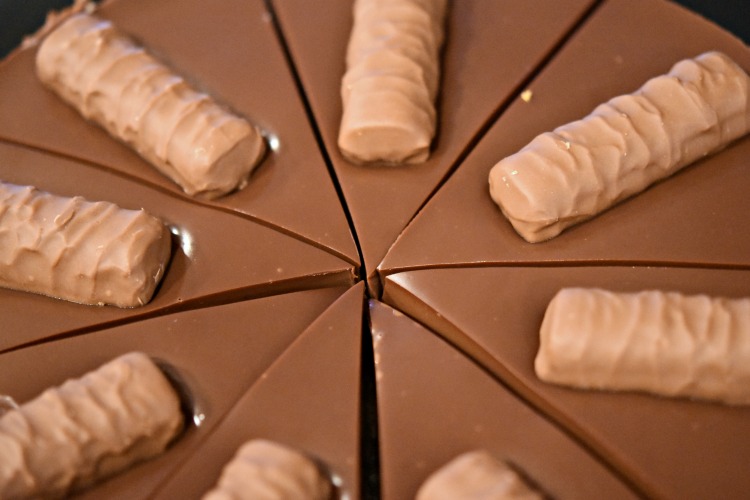
Update!!!!  Just when I thought this cheesecake could not get any better, my baking buddy Liz over at That Skinny Chick Can Bake topped it!  She made this for our Two Sweetie Pies feature and forgot to add the layer of caramel …creating a totally different presentation of this cake that I loved!!! She also had the brilliant idea to top the cake with snack size Twix candy bars!!! Genius, especially with all of the Halloween candy I still have laying around my house.  If you choose this version, you may want to serve some caramel on the side or just skip it.  This is one decadent cake-I Hope you enjoy and Liz, thank you for your wonderful tweaks!!!!!  I think I am sticking with them!!! 
twix-cheesecake-ganache twix-cheesecake-precut twix-cheesecake-slice twix-cheesecake-sliced twix-triple-layer-cheesecake
cheesecake slices fudgycheesecake caramel slices

17 Nifty Ways to Organize Your Fridge

Reblogged from: Shareably

Your refrigerator is one of the most important appliances in the home. It’s the storage location for food and beverages. So that makes it very important to keep it clean and sanitary.

If your fridge is messy, then this could lead to all sorts of problems like food poisoning and other food-borne illnesses. You also don’t want to be cleaning your fridge every week, either.

mustardeggcarton
That’s why we have compiled a list of clever, creative ways to organize your fridge and freezer.

1. Chalkboard Fridge
Paint a chalkboard on the front of your fridge, so you can easily let your family know what’s for dinner. You can find full instructions by clicking here.

fridgebeforeafter

2. Or Use A Dry Erase Board
If you don’t want to paint a chalkboard, then use a dry erase marker to write on your fridge. This can help you keep inventory of your food. Be sure to keep permanent markers away from the area!

fridgesharpie

3. Create An “Eat Me First” Basket
One of the most difficult things we struggle with is perishable foods. It’s really easy for us to forget about them when they are in the fridge. To stop worrying about food going bad, create an “Eat Me First” basket where you can place what needs to be eaten first. Now you can will minimize food waste.

eatmefirstbasket

4. Dedicated Snack Zone
If you have kids, they love rampaging through the fridge and leaving a mess just to get their hands on some snacks. To avoid this problem, create a snack zone in your fridge and fill it with healthy snack options like granola, yogurt, nuts, and fruit.

snackzonekids

5. Magazine Freezer Shelves
Transform a magazine holder into an organizing device for the freezer. Flip it on its side, and now you have freezer shelves!

magazinefreezershelf

6. Fridge Bins
Plastic bins are great for organizing things around the house, so naturally, they are great at organizing your fridge as well.

fridgebins
7. Label Everything
When you use fridge bins, be sure to label the contents to make it very easy to find what you are looking for. This also lets you quickly know what you need to get more of during your next grocery trip.

freezerorganizationlabels
8. Reduce Condiment Clutter
Buy squeeze bottles and label them to reduce the condiment clutter in your fridge.

squeezebottleclutter
9. Grab & Go Basket
Add a special basket in your fridge that’s meant for grab & go items like fruit. This should be easy to access for anyone looking for a quick bite to eat.

CleanRefrigeratorOrganization_7
10. Binder Clip Trick
Use binder clips on the freezer shelves to help maximize space.

binderclips2
11. DIY Shelf Mats
Cleaning shelves in the fridge is painful. You have to remove all your items in the fridge just to do it, making it very tedious. To avoid this problem, use shelf mats to make cleanup  a breeze.

Cut plastic placemats to fit the shelf. When you need to clean them, remove the mat and dump them in the sink

fridgetip1-1024x538
plasticshelfmats
12. Lazy Susan
A Lazy Susan isn’t just meant for restaurants. It can also be used in the fridge. This puts almost anything in your fridge within convenient reach. You no longer have to look all the way in the back of the fridge for that yogurt that was hiding from you.

This will also eliminate those unpleasant moldy surprises…

lazysusanfridge
13. Freezer Bags
If you have an upright chest freezer, then sort the contents using reusable shopping bags.

chestfreezerbags
14. Practical Egg Basket
If you don’t have egg slots built into your fridge, then make your own.
eggbasket
15. “Opened On” Dates
Use a sharpie and masking tape to label the dates you opened an item. This helps you keep track of when an item has likely gone bad.

mayoexpires
16. Single Serve Magnetic Containers 
Attach magnetic plastic containers to the sides of your fridge. This is great for storing small snacks like nuts or seeds.

Magneticplasticcontainers
17. Know Where To Store Items
Believe it or not, the fridge temperatures are varied depending on location. While your refrigerator may show a certain temperature, it’s not entirely accurate. Knowing where to store your food can extend its longevity.


wherehowfridge

What did you think? We want to hear your thoughts. Let us know in the comments below!

DIY Rocking Chair Cradle-in-One Combo

Reblogged from: Instructables

building a rocking chair with a crib

In this DIY I will show you the steps to building a rocking chair with a crib attached to it. This design is fairly simple to construct if you have the right tools and very basic carpentry skills.

Before you start the project there is one thing you should think about. The design I made has a big crib area, this made it hard to find a fitting mattress, you might want to find a mattress first and adjust the sizes in the blueprint accordingly.

Step 1: tool and supplies

Tool:
hand saw (you can use a table saw for most of the parts)
drill
sander (with soft and rough sanding paper)
brush
staple gun

Supplies:
wood glue
super glue
screws (about 30 not longer than the thickness of the wood and 4 slightly longer)
4 metal corner brackets
paint/varnish
fabric (50x50cm for the upholstery 100x100 for the crib)
foam mattress (42x44cm for upholstery and 96x44cm for the crib)


Wood:
For this project you need to get whole wood (not MDF, plywood or sandwich boards), I got some pine plates. The 3 big pieces (the sides and the base) are 2.8cm thick, the rest are1.8cm. I recommend you consult with a professional if you decide to use anything different.


The sizes of the plates you will need are specified in the blueprint. In addition you will need a 42X44cm piece of any wood for the upholstery (thick enough so the staples wont go through).


Step 2: blueprint and model

blueprint and model

1-16 model b.jpg 1-16 model a.jpg

I scanned and edited my sketches for this DIY. All the measurements are in centimeters.

As I said before, you might want to adjust some of sizes to better suit your needs.

I also recommend building a scaled model if you have the skill. I used some spare 4mm plywood to build a 1:16 model based on the blueprint. as you can see the scaled model is slightly different from the life size, that's because I made some changes after seeing the model, that's why I recommend you build one.

Step 3: cutting the wood

 cutting the wood

IMG_1626.JPG

Wings: The two wing are identical so they fit together, all you need to do is draw a 32 cm line at 20cm from each side and connect the ends, then cut through that line. Now cut the bottoms at a 14 degree angle, If you don't have the tools to do this accurately, draw a line 0.5cm from the bottom and cut between that line and the opposite corner as accurately as you can, then correct by sanding. remember that each wing is leaning in a different direction so cut the bottoms accordingly.

Armrest: For the armrest just measure 5cm from each of the bottom corners and draw a line from there to the top corners, then cut.


Sides:The sides are the tricky part. Use a 125cm stick or string, measure 125cm directly above the center of the bottom and anchor the stick/string (I used a long strip of wood and anchored it with a screw to some more wood). Now trace a circle along the edge of your string while it pivots around the anchor point (see picture). The curve on the bottom is part of a circle 2.5m in diameter. use the crossing lines in the blueprint to draw the rest of your mark and cut. Use the extra wood to make armrests and support for the backboard (step 5). Sand down the curves until they rock smoothly on the floor.


Step 4: assembly

 assembly
 IMG_1628.JPGIMG_1630.JPG
 IMG_1632.JPGIMG_1631.JPGIMG_1634.JPG
 IMG_1635.JPG
 IMG_1633.JPGIMG_1636.JPG

Mark a line under the center horizontal line on side A and B (make the distance between the lines the thickness of your base) and attach two brackets to each side using screws. Find a couple of boxes or any random objects and lay the base flat on top of them at a 20cm height. Flip side B so the curve is facing up and the brackets are towards the base, apply wood glue to the end of the base and attach. use more screws to secure the connection with the brackets.

Once the glue is set do the same thing for side A using something 40cm tall to put the base on top.


After you are certain these 3 main pieces are secure by sitting on them, flip the entire thing on its side (side A flat on the floor) and glue the wings in (I used some tape to hold the wings in place for 24 hours while the glue sets, not very professional but it did the trick, use clamps if you have any).


Now glue the armrest piece on top of the wings (I used weights to make sure its glued evenly on all 3 sides)

Step 5: backboard and armrests

 backboard and armrests
 IMG_1643.JPGIMG_1646.JPG
 IMG_1645.JPGIMG_1666.JPGIMG_1670.JPG

Backboard:
cut the backboard piece so that it fits perfectly in the space between the two armrests (you should need to trim off the thickness of the armrest piece). Using leftovers from side A, cut two pieces 7x52.5 cm and round off two corners (see pictures). Glue the backboard to these two piece and leave to dry.


Once dry, flip the entire crib sideways (the place where the backboard goes should be facing up (this is the time to decide if you want the crib on your left or your right as you sit in the chair), glue the backboard into place and hold it down with weights or clamps. When the glue is set, flip the crib back and test the strength of the backboard by leaning against it (you don't want this to fall apart when you have a baby in your arms).


Armrests:
use leftovers from side B to fashion a couple of armrests, I made mine 5x55.5cm with a round edge. I also cut the back corners off making the back only 4cm wide (see pictures). Don't forget to give the back of the armrests a 14 degree angle so they fit with the backboard. Glue the armrests into place (I placed them in the center of the two pieces holding the backboard up).


Addition:
I also use some leftovers from the armrest piece and some scrap wood to make something that will stop the crib from rocking (if you want it to). Just glue two small triangles to a strip of wood at a distance that will allow you to just be able to slide the triangles underneath the curve.

Step 6: sanding and paint

 sanding and paint
 IMG_1659.JPGIMG_1660.JPG
 IMG_1663.JPGIMG_1664.JPG

Now that the crib is built, sand down all the surfaces and round out all the edges so that there are no sharp edges or splinters anywhere.

If you have an air-compressor and the right fittings for it you can spray paint or varnish using that. Either way, use a brush to even out the paint/varnish and get rid of dripping parts. Always brush with the fiber of the wood not against it.


I used 2 layers of varnish with brown coloring so I could keep the natural wood look and make it darker. If your not sure if the color you picked will come out nicely, paint a leftover piece of wood and wait for it to dry. Use smoothing sand paper (00, the least rough one) between each layer of paint/varnish.


If you plan on keeping this crib outdoors I recommend a layer or two of clear varnish on top of whatever you already used. 

Step 7: mattress and upholstery

mattress and upholstery
 IMG_1667.JPGIMG_1668.JPG
 IMG_1669.JPGתמונה 2.JPG

Mattress: If you did not buy a ready made mattress for the crib, you have some sewing work ahead of you. Buy a waterproof fabric (about 100x100cm) and make a case for the foam mattress. I recommend also making a removable sheet that you can take off and wash so the baby wont be directly on the waterproof material which is usually not comfortable.

I don't have any pictures of making the cribs mattress because I bought a ready made mattress that was twice the width and just cut out half the foam from inside.


Seat: Cut a piece of wood 42x44cm (at least 0.6 cm thick), round out the edges, glue the foam mattress to the wood with super glue (or any strong glue), cut the edge of the foam at about a 45 degree angle to give it a slope at the ends. Using a staple gun, tightly staple the fabric of your choosing (I chose black fake leather) from all sides to the bottom of the wood then cut off any extra fabric. Center the entire thing on the seat and secure it into place using slightly long screw from the bottom (make sure your screws are long enough to get through the base but not through the wood you used for the upholstery)

Monday, January 23, 2017

How to Clean Oven Glass

Copied from: DIY Home Sweet Home

How to Clean Oven Glass - it seriously is that easy


So here is what my oven glass looked like when we moved in.


And here is what it looks like now

Want to clean your oven? I promise its super easy.


Ingredients:
Water
Baking Soda

Add about a 1/4 cup of baking soda in a dish and mix just enough water to make a thick paste. 
 
Spread your mixture all over your glass (and the door if it needs it too. Mine did).

 
Wait 15-20 minutes (or if it is really, really bad like mine you can wait 30 minutes. Not sure if this is necessary but that's what I did.).
 
After 15, 20, or 30 minutes wipe off. If there are still spots left they should easily scrub off with a scour pad.
 
And Voila...

Wednesday, January 18, 2017

11 Surprising Uses For Epsom Salt In And Around Your Home

Copied from: Simple Most

P1240047

Epsom salt has been around forever. It’s not salt, per se, but a naturally made pure mineral compound of magnesium and sulfate. It’s known for many health benefits, such as lowering inflammation, helping nerve and muscle functioning as well as alleviating migraines and sunburns to name a few.

As beneficial as those baths are, there are so many other uses for Epsom salts, including the following 11 things:

1. As A Face And Body Scrub

By adding a tablespoon of Epsom salt to your face wash, you have an instant skin exfoliator. If you add some olive oil, too, you now have a body scrub also.

2. A Soothing Face Mask

To soften your skin, try making this simple face mask. All you need is Epsom salt, mayonnaise, and some grated carrot. Yes, carrot. After ten minutes, your skin will be so smooth you’ll want to apply the mask again.

3. Help Dry And Oily Hair

When you add Epsom salt to your bottle of shampoo, you’ll have an instant formula for getting rid of oily hair. You can also add it to your conditioner, microwave it, then apply it to help with dry hair.

4. Cleanse Your Hair From Excess Products

Don’t you hate going to bed with hair products in your hair? But now, Epsom salt is here. Just mix some with water and lemon juice and cleanse your hair with it, then shampoo.

5. Get Rid Of Blackheads

Like them or not, all of us probably have them: blackheads. When you wash your face with Epsom salt and water, it can help get rid of those pesky hair follicles under your skin. You can also add a bit of honey to the mix and use that is a facial wash, too.

6. Help Regulate Bowel Movements

While this may not taste the best, Epsom salt acts as an all-natural laxative. All you do is dissolve a teaspoon of Epsom salt in four ounces of water and drink. You can also add lemon juice to make it taste better.

7. Help Remove A Splinter

After you soak the splintered area in Epsom salt, the foreign matter should come right out. Pronto!

8. Relieve Mosquito Bites

I know, what can’t Epsom salt do? With Spring on its way, mosquitoes will be out before we know it. After you’ve been bitten, soak a washcloth in cold water that has Epsom salt in it. Then, apply the cloth to the bite area(s) and you’ll feel better in no time.

9. Deter Slugs

If your area has a lot of slugs slithering by, just sprinkle some Epsom salt in their path. That’ll make them take a new route.

10. Fertilize Your Garden

That’s right, your garden will benefit from Epsom salt greatly, too. So try it with your house plants, tomatoes, peppers, your lawn, trees, garden, and even rose plants. The National Gardening Association discovered that pepper plants grew larger with Epsom salt, for instance, and more flowers grew as a result, too.

The sulfur from Epsom salt helped produce vitamins and the magnesium helped seeds germinate, increasing chlorophyll production, for example. So, you can’t go wrong with adding Epsom salt to your garden.

11. Clean Your Tile And Grout

Before you go spend money on fancy tile cleaners, reach for your Epsom salt instead. Also, grab your liquid dish detergent and mix the two together. Then, go attack those grimy bathroom tiles and grout. Someone has to do it… but at least you won’t be breathing in harmful chemicals in the process.