Tuesday, January 28, 2014

How to photograph your kids

This blog is brought to you by: All Parenting


We all know kids grow up too fast, but photography can be your best friend when it comes to helping you archive those little moments you never want to forget. Even if you don't consider yourself a shutterbug mom, you can still learn how to photograph your kids like a pro with these tips from professional photographers. From how to capture personalities on camera to cutting cheese from your vocabulary.

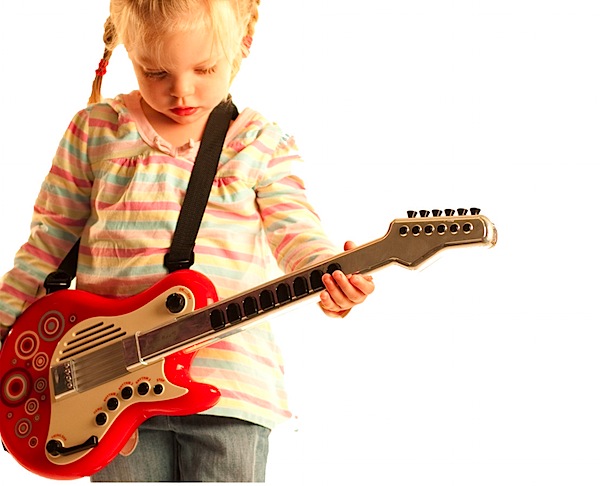
Capture your child's personality

Kami Leonard Photography

When getting your youngster in front of the lens, the key to keeping your sanity is to accept that snapping a full grin portrait isn't the only picture perfect photo. "One thing I try to tell clients is to embrace their kids' personalities when they do come through," shares Kami Leonard, photographer and digital designer, www.scraporchard.com. "The photo may not always end up on the mantle but odds are that the grumpy face you capture when they are refusing to let you take a picture is more them and what you'll remember the most."

Narelle Bailey Photography
 Clear the clutter


Capturing your cute kiddo on camera is the goal, but before you get your shutterbug on, be sure the background of your photo is clear of clutter. "When composing your shot, make sure you slow down and examine all parts of your frame," advises Narelle Bailey, www.narellebaileyphotography.com. "Everything within your image should be there for a reason. You want to ensure that there are no distracting elements taking the focus away from your subject."
CaptureYour365 Photography


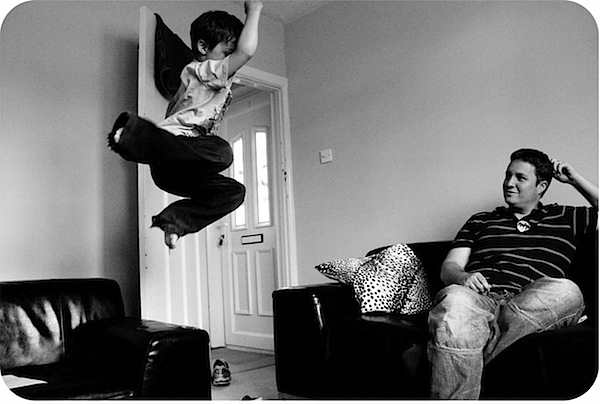
 Use a fast shutter speed


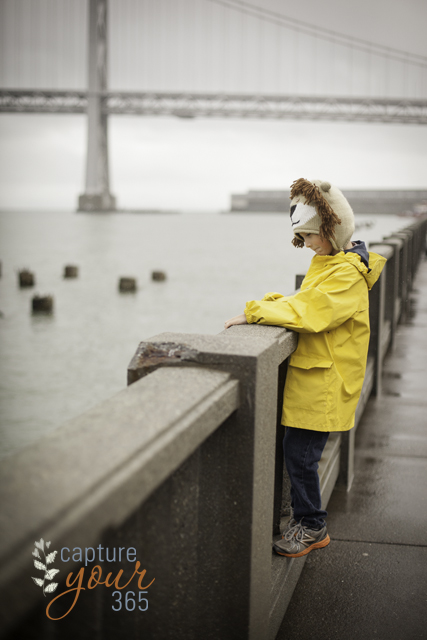
No matter how cute your kiddo's mug may be, a blurry photo can ruin the shot if that's not the look you are looking for. "Kids move fast! When photographing your kids, think fast shutter speeds," recommends Katrina Kennedy, www.captureyour365.com. "I use 1/125th of a second as my rule of thumb for everyday kid movement. Outside? At the park? Then I bump it up to 1/500th of a second to stop the speedy ones."


Put kids at ease

Cindy Turner Photography

For some youngsters the very sight of the camera lens causes them to become uncooperative, but simply changing the mood will help you capture the photograph you're hoping for. "Try having them sing their favorite song from their playgroup or school," suggests Cindy Turner, www.cindyturnerphotography.com. "I love to get them singing songs that make them giggle so I can get those perfect laughing shots."
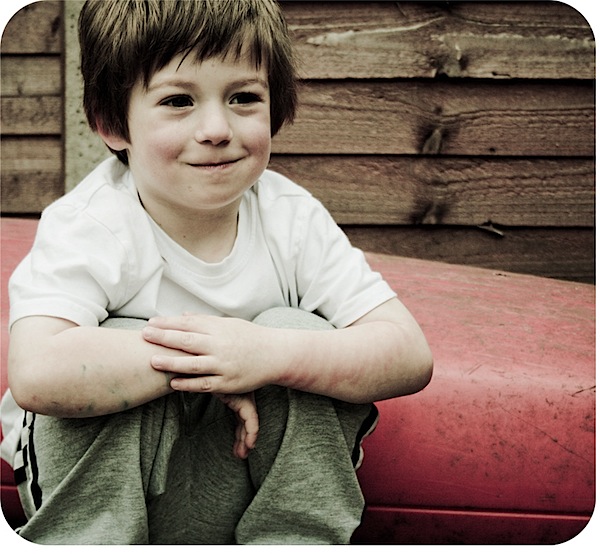
 
Michelle Kane Photography Don't say cheese


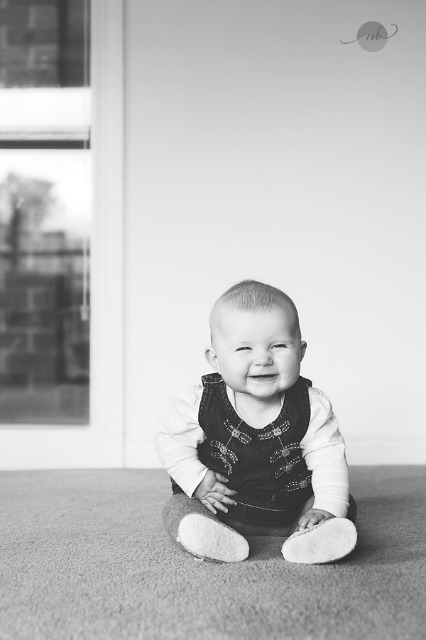
While many a people behind the camera have had the best intentions when saying cheese, in kids this word will give you the most unnatural, and often unflattering, smiles for your photos. "You will never catch me telling a child to say cheese for the camera," divulges photographer Michelle Kane, www.michellekanephotography.com. "Rather, I prefer unprovoked photos where the interaction and response is authentic. Those are the moments that deserve to be frozen in time."


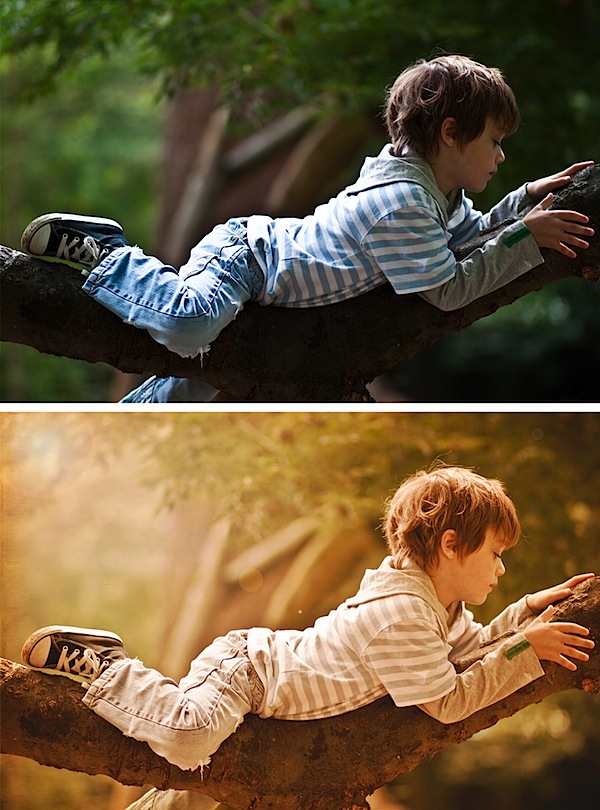
 Photograph kids in their natural environment

Tamara Kenyon Photography

You may have visions of the perfect portrait but when you stick your kid in a formal ensemble and expect him or her to sit pretty, you may be setting yourself up for failure. "Don't worry about getting that perfect cheese smile of your child looking at the camera," offers Tamara Kenyon, www.tamarakenyon.com. "Embrace the moment as it is. Photograph your child as they are, instead of creating an artificial moment." Capture their smiles while they play, take them to the park or simply go into stealth photography mode and shoot their TV watching habits.

Most importantly, be patient. You can study tips on how to photograph your kids until you're blue in the face, but once you lose your cool, you can guarantee all you'll capture on camera is your little pumpkin pouting.

8 Tips for Mom-a-raz-zo Photographers

This blog is brought to you by: Digital Photography School

n. pl. mom-a-raz-zi – A mom who doggedly pursues her children to take photos
Much like the paparazzi who have become notorious in Hollywood for stalking celebrities and making their lives miserable, I must confess that I belong to the growing community of parents who pursue, nay, stalk their children day in, day out, to take photographs. The thought of a single day, field trip or activity going undocumented simply does not bode well for me.

Photos of children are so vastly different from other types of photography. A photo of a child will always evoke emotion, no matter the quality, subject matter, composition – children are dear to every heart in some way or another so when I photograph them and approach a shot to edit, I handle each shot with sensitivity. Having taken about 30,000 photos in the past 7 years, it could be easy to become emotionless and robot-like in my approach to photography. Rather, I remain strongly connected and with deep emotion, particularly in regards to children.

Here are 8 tips I’d give any aspiring momarazzo to bump up your game:

{1. Point of View} Try a different point of view rather than the normal face-on photo. Wait until they’re doing something sweet and try a shot of what they are doing.

hangingaround.jpg

{2. Something to do} Hand them a toy or get them involved in an activity and wait until they’re engrossed before you start shooting.

christianna.jpg


{3. Back Off} Back up and zoom in. Children have a very good sense for when they’re being manipulated and as any parent knows, they hate to be controlled. Back up, get out of their space, zoom in and just wait.

roundedjacksm.jpg

{4. Cropping} When you crop a photo, give your subject a space to look into. If they’re facing or staring into a certain direction, give some space on that part of the photo to give the viewer a sense that they are present in the moment. It makes you wonder ‘what are they looking at?’ Don’t place your subject in the dead-center of a photo.

sophia.jpg

{5. Get sporty} Whether you use a point-and-shoot camera (the kind without changing lenses) or an SLR (the kind with changing lenses), I’ve found the sports mode the best for children. Kids move FAST and so to catch them in action requires a very fast shutter. Also on some cameras, the sports mode allows continuous shooting where you hold down the shutter button and it just snaps shot after shot in succession. Then you can pick the one that caught that perfect moment.

sofasurfing.jpg

{6. Make them scream} Kids hate being forced to smile and quickly learn to just ’say cheese’. Tell them to scream or shout something like “NO!” or “PEE!” Anything is better than the ‘cheese face’ and shouting makes for interesting expressions.

jasim.jpg

{7. Get Down} Everyone knows that kids are little. Get down and shoot on their level. Don’t make them come up to yours. Get down on your knees or lay on your belly and see what the world looks like from there.

Untitled-1.jpg

{8. Edit} Play with your photos. Every photo can be made a better with a bit of editing. Editing can consist of changing a photo to b&w, playing with color levels or adding a glow (great for kids). More intensive editing can be things like texture layers, color replacement, adding blur, selective coloring, etc. Professionals and pro-sumers use programs like Lightroom or Photoshop (you can get free trials from the Adobe website).

I started out with Google’s Picasa (FREE!) program. You can download it and use to organize end edit your photos and even make slide shows to upload on YouTube or photo collages. There are quick and easy buttons to add a glow, transform the color or bump up the saturation to make your colors more vibrant. Picasa is an excellent place to start if you want to experiment with editing your photos.

ba8.jpg

Most of all, have fun and make your own rules. Photography can be the most intensely enjoyable hobby for yourself and your fans. Get out there and enjoy, enjoy, enjoy!

Sunday, January 26, 2014

Homemade Shampoo Part Two

This blog is brought to you by: Ashley's Homemade Adventures


Since my homemade shampoo recipe is by far the most popular post on my blog, I decided it was time for a part two! I have had many questions on here, and facebook that I wanted to address and I also have some new ideas to share as well.

First of all, I know some of you may be hesitant to buy a whole bag of xanthan gum just to try my shampoo recipe and I don’t blame you one bit! The good news is they sell little tiny packets of it! I found these in the baking aisle for less than 50 cents each! One packet has enough to make a gallon of shampoo, perfect for making a test batch.


Probably the most common question I get asked is if there is a way to make the shampoo thicker. I know it can be a little hard to adjust when you are used to the products in the store. I have been able to make it thicker but still not as thick as commercial shampoo. I will share the recipe to make it slightly thicker at the end of this post. I am sure you could get it even thicker if you wanted, but part of the reason I make this is to save money. If you are trying to make it thicker you will be using more ingredients, which means it will cost you more money. It will also take you more time to make it. I would love to experiment even more but I make no money from this blog and can not afford to waste supplies I need. Yes it is rather thin, but it still works great for us. Just put it in a squirt bottle and apply it directly to your head and you are good to go. 
A couple of people have mentioned to me that their hair did not feel quite clean after using this. There are a few reasons why you might have this problem. This shampoo will not strip your hair like the harsh detergents in store-bought shampoo. You may need to massage this into your scalp a little more than you would with your old shampoo, it is meant to be more gentle on your hair and scalp. I have also read about your hair/scalp having an adjustment period when you stop using store-bought shampoo. You can add a little extra castile soap and slowly cut back on the amount you use while your hair gets used to the new shampoo. If it is used to being stripped of oils, it is used to making extra oil to compensate. You may need a few weeks to adjust to this, but please don’t let this discourage you. If your hair looks greasy on the second day, simply brush some cornstarch through it. This will help absorb the oil and you can even add a little essential oil to the cornstarch first for a nice scent.  I do not wash my hair every day, it is bad for your hair and frankly a pain. No matter what I use I still have the problem of my hair being a little greasy looking on the second day. Sadly some of us are just “blessed” that way. No store-bought product ever helped me with that issue either but my homemade shampoo does still get my oily hair clean.

Another fairly common question is “How long does it keep?”  I don’t think there is any set answer to this question. Honestly I think this really depends on how you make it and store it. If you boil your water first, use an essential oil that is anti-microbial and then store your extra shampoo in a dark, cool place I am sure that will help it last longer. I have kept mine under my bathroom sink for 3 months before it went bad. If you are concerned about this I would make a half recipe at a time, and I would also suggest smelling it before refilling your shampoo bottle for the shower. You will definitely be able to tell if it has gone bad or not.
I wanted to add that it is NOT necessary to use tea.  Since my original shampoo post I have made it with just plain water and prefer to make it that way now. It is easier, cheaper and works just as great. If you use water and unscented castile soap (like Dr. Bronners Baby Mild) it is better for children or individuals with sensitive skin.

I hope this information has helped clear up any questions you may have. If anyone has any other questions please feel free to post a comment and I will do my best to help you. I would also love to hear more reviews as well.  This is still the only shampoo that we use and I don’t foresee us switching back to store-bought anytime soon! We have been very happy with it and I hope you will give it a try if you haven’t already.

Homemade Shampoo – Thicker Formula
  • 13 cups water or tea
  • 1 cup cold water
  • 1/4 cup cornstarch
  • 1/2 cup baking soda
  • 3 tsp xanthan gum
  • 1/4 cup castile soap
  • 30 drops essential oils (optional)
Add 13 cups of water to a large pot. In a seperate bowl mix together the remaining cup of cold water and cornstarch, whisk until no lumps remain. Pour cornstarch mixture into large pot with the water. Bring to a boil and whisk constantly for several minutes until slightly thickened. Remove from heat, whisk in baking soda, xanthan gum and castile soap. Let cool completely, mix in essential oil.

Update ~ After using the thicker formula a few times I have noticed that it does not foam up as much as my original shampoo recipe. It still works to get your hair clean but I will be sticking with the original or skipping the cornstarch and just using less water. 

Homemade Shampoo

This blog is brought to you by: Ashley's Homemade Adventures


I have tried so many recipes for homemade shampoo. I am going to share a little bit of my experiences with you, then let you in on my shampoo recipe. This is probably going to be a pretty long post, but please bear with me… you will learn a lot I promise.  After reading about the chemicals in store-bought shampoo I was determined to find an alternative.

When I first started researching going “poo free” as they call it. I heard about using baking soda and vinegar. I wasn’t quite ready to make that dramatic of a switch, so I started off with Crunchy Betty’s “Sorta Poo”  (I love her blog btw!) Now I absolutely LOVED how this stuff made my hair look and smell. It was heavenly! It is made with castile soap and coconut milk. There were 2 downsides though…. One my hair felt like it had a little bit of a residue but that could have been from the coconut milk I was using. Two you have to make a new batch each time you shower, or store it in the fridge. A few times I forgot to make it, or didn’t have time so I had to reach for the store-bought shampoo as back up. So I decided to make it ahead of time and store it in the fridge. A few times I jumped in the shower only to remember my shampoo was in the fridge, not fun. It also is REALLY cold when you do it that way, my 4-year-old was not a fan of really cold shampoo lol. So I decided that it just wasn’t working for me. But if you have castile soap you should really try this at least once, your hair will look amazing! If you do try it, I would not recommend using peppermint castile soap, unless you like a really strong tingly feeling.

So after sadly giving up my “sorta poo” I decided I was ready to try “no poo”. This is by far the best information I found on “no poo”. I loved how cheap and easy this was, and you don’t have to store it in the fridge. You wash your hair with baking soda, and use an apple cider vinegar afterwards to soften your hair. It was fantastic for my daughter’s hair, and for my roots. The problem with this for me was… my hair has been processed so many times. There is no pretty way to put it, its fried! lol. So unfortunately this just did not work for me either. My ends needed a little more lovin! I am in the process of growing my natural hair out now, so maybe I can go back to this one day.  I have also seen people complain about their hair not smelling yummy like with regular shampoo and conditioner, which is true. But to fix that all you have to do is spray your favorite body spray on your brush when you brush your hair, problem solved!

So after experimenting a little bit I finally came up with my own homemade shampoo recipe. I am extremely excited to share it, because well it’s just awesome! lol. It leaves you hair clean, smelling good and really shiny. Best of all NO chemicals!  :) It also does lather a little bit unlike the “no poo” method. I read that chamomile tea was a natural way to gradually lighten your hair (if it is naturally fair to begin with) I am not sure if this is true but it got my mind going. So I thought… I will take the castile soap from the “sorta poo” and the baking soda from the “no poo”, use tea instead of water and add in some essential oils. But then it got even better! I had bought some xanthan gum for a conditioner recipe I tried out so I added that as well. I was amazed with the results and I am happy to share. So you will need:
  • 1 gallon of brewed tea or water
  • 1/2 cup baking soda
  • 1/4 cup castile soap
  • 3 tsp xanthan gum
  • essential oils (about 30 drops-optional)

For the shampoo I made this time I used regular tea, almond castile soap (I absolutely love Dr. Bronners), and tea tree oil. If you have never heard of xanthan gum don’t worry, I found it right at Wal-Mart in the baking aisle. If you can’t find it at any stores there is always the internet! It is a little expensive I think I paid around 12 dollars for this bag. BUT a little goes a long way, and you can use it for gluten-free baking too. 

You can buy castile soap at Target, Whole Foods, GNC. It is also a little pricey up front (This bottle was 4-5 dollars) but you can use it for SO many things. I use it in my all-purpose cleaner, you can use it to wash your dog, car, walls, etc. It really is amazing stuff. 

So first, brew your tea. I put the tea bags right into the cold water, then heat the water just to where it’s steaming and you see little bubbles on the bottom. Then I take it off the heat and let the tea steep for about 5-10 mins.


Next, remove the tea bags and stir in your baking soda. It will fizz up for a minute like this:


At this point you can let it cool off some before adding in the rest of the ingredients if you would like. You will want to whisk in your xanthan gum next, a little at a time. Then stir in your castile soap and essential oil. I keep forgetting to add the xanthan gum before the castile soap, silly me. So I ended up with a foamy top on my mixture while stirring in the xanthan gum. Not a big deal except it causes little clumps and its hard to see when it’s all mixed in. It doesn’t affect the end result, its just a little bit of a pain. This is what happened to me, lol.


Here is what it will look like when its done. I had little clumps because of my oopsie, but they mostly dissolve anyways so its nothing to worry about.


After it cools completely stir in your essential oil then just pour some into an empty bottle for the shower and store the rest under the sink in an old milk or water jug. Use just like regular shampoo, and enjoy your clean, pretty smelling, shiny hair.  There are so many variations you could do with this as well. The first batch I made was chamomile tea, with lavender Castile soap and lavender essential oil. You could also do green tea, with citrus Castile soap and lemon essential oil, or coffee with almond, etc.

I am still trying to find a conditioner recipe that I am happy with, so for now I am using a sulfate and paraben free kind called “Simply U Conditioner” (Color Shine formula) along with this shampoo.

(Please check out Homemade Shampoo Part Two for answers to some frequently asked questions and a recipe for a slightly thicker formula)

Thursday, January 23, 2014

The 15 Best Weight Loss Tips, Ever!

This blog is brought to you by: Yahoo!

 
By Diana Kelly, Prevention


If you've ever tried to lose weight (and who hasn't), you've got to be mindful of whose advice you take. Your colleague says you need to cut out carbs. Your gym buddy knows the secret is to stop eating after 7 p.m. Your Facebook friend swears she'll be in swimsuit shape by March if she only eats once a day. Your husband, well, he sneezes and the weight seems to fall off.

But do any of these tips really work? To help you shed those extra pounds--and keep them off--without starving yourself, ditching your social life, or eating only at odd times of the day, we talked to experienced nutritionists for real-world advice you can actually live with, day in and day out. We'll tell you how to focus on the delicious foods you can add to your diet, why you should be eating more often (yes!), the fat loss benefits of more sleep, and how even taking a few deep breaths can put you on a successful path to weight loss. Here, the 15 best diet tips of all time. Say buh-bye to hunger and hello skinny jeans.

1. Never get too hungry
You make poor decisions when your judgment is compromised. Hunger is a primal urge that's difficult to deny. When you're famished, it's hard to hold off until you can find healthy food. As a result, you end up eating anything that's not nailed down, and typically, regretting it. Planning meals and snacks works wonders to head off the intense hunger that can do a number on your best intentions to eat right. Always tote healthy snacks, such as an ounce of pistachios, a hard-cooked egg and some whole grain crackers, Greek yogurt, or 1/4 cup raisins. Don't skip meals or skimp on them, either. Here, 6 portable, protein-packed snacks that fill you up!
--Elizabeth Ward, RD, author of MyPlate for Moms, How to Feed Yourself & Your Family Better

2. Be honest about your daily calorie allowance

Everyone has a calorie budget, whether you're trying to maintain your weight or lose a few pounds. I've found that people ignore this simple fact. Your calorie budget allows you to build a healthy diet, and it helps prevent frustration about weight control. The 2010 Dietary Guidelines for Americans provide suggested daily calorie intakes based on gender, age, and physical activity level. When you know your calorie budget, then you can plan on how many servings of fruits, vegetables, whole grains, low-fat dairy, and other protein sources to include every day.
--Elizabeth Ward

3. Use the red, orange and green rule

At each meal include one food that is any of these colors. By focusing on these foods, you'll be sure to get some produce on your plate and won't have space on your plate for higher-calorie fare.
--Lyssie Lakatos, RD, and Tammy Lakatos Shames, RD, authors of The Secret To Skinny: How Salt Makes You Fat

4. Eat one less bite

Doing this at every meal could save about 75 calories a day which equates to nearly an 8-pound weight loss in one year!
--Lyssie Lakatos and Tammy Lakatos Shames


5. Be a heavy drinker
Water is essential for keeping the body hydrated and we're actually more likely to retain "water weight" by not drinking enough of it rather than by having too much. The needs of each person will be different, but the general recommended daily amount is 64 ounces. It also takes up space in your stomach so you'll feel fuller while taking in less calories.
--Lyssie Lakatos and Tammy Lakatos Shames

6. Kick the salt habit

Salt is a big contributor to weight gain and often a reason why the numbers on the scale aren't going down. The average American consumes twice the amount of salt they should have each day, leading to weight gain, bloating, and the inability to lose stubborn pounds. Salt can also make you feel hungrier and thirstier, so check the nutrition labels for high sodium levels and choose fresh over packaged or restaurant foods. You'll see a puffy face and belly go down quickly just by cutting back on your sodium intake and choosing more natural foods.
--Lyssie Lakatos and Tammy Lakatos Shames

7. Spice up your food

Adding hot spices to your meals can help curb hunger, according to a study in the British Journal of Nutrition. Need another reason to add some heat? Scientists at the State University of New York at Buffalo found that capsaicin (a compound found in chilies) triggers your brain to release feel-good endorphins. A full belly and a good mood? Pass the hot sauce!
-Christine Avanti, CN, author of Skinny Chicks Eat Real Food
 

 8. Don't think diet soda will help you lose weight
A University of Texas Health Science Center study found that the more diet sodas a person drank, the greater their risk of becoming overweight. Downing just two or more cans a day increased waistlines by 500%. Why? Artificial sweeteners can disrupt the body's natural ability to regulate calorie intake based on the sweetness of foods, suggested an animal study from Purdue University. That means people who consume diet foods might be more likely to overeat, because your body is being tricked into thinking it's eating sugar, and you crave more.

A separate study found that even just one diet soda a day is linked to a 34% higher risk of metabolic syndrome, the group of symptoms including belly fat and high cholesterol that puts you at risk for heart disease. Whether that link is attributed to an ingredient in diet soda or the drinkers' eating habits is unclear. But is that one can really worth it? (Still not convinced? Check out seven more health risks associated with drinking diet soda.)

9. Focus on nutrient balance instead of calorie counting
Making sure an eating occasion has carbs, protein, and fat instead of just counting calories (like a 100-calorie pack) delivers better energy and fat loss results by giving the body what it needs, like quick- and longer-digesting nutrients so you stay full longer.
--Ashley Koff, RD, Prevention Advisory Board member


10. Plate food away from where you're eating

By keeping food within eyesight as you are eating, you may find yourself reaching for a second helping even if you really aren't hungry. Place the food on the kitchen counter or stove, portion out a serving on your plate and then sit down at the table and eat. This way, if you want additional servings, you'll have to get up, which helps you to be more mindful of what you are eating.
--Erin Palinski-Wade, RD, CDE author of Belly Fat Diet For Dummies


11. Keep a food record
We know you've heard this time and time again. Well, that's because keeping a food record is vital to losing weight and keeping it off long term. A study published in the American Journal of Preventive Medicine found that those who kept regular food records lost twice as much weight as those who didn't. When keeping a food record, make sure to track what you ate, how much you ate, anything you added to the food (condiments, oils, etc.), and what you drank. Also tracking your mood and appetite can be helpful and insightful into learning about your eating patterns as well!
--Erin Palinski-Wade

12. Start with soup
People who ate a low-calorie vegetable soup before a meal consumed 20% fewer calories at the meal, according to research from Penn State Unniversity. Have a low-calorie broth-based veggie soup before your largest meal of the day to reduce calories and lose weight without feeling hungry.
--Erin Palinski-Wade


13. Take your time

Rapid eaters are often heavier than slow eaters, according to research from The University of Rhode Island. It takes 20 minutes for your stomach to send a message to your brain that you have eaten enough and are satisfied. If you rush your meal and eat rapidly, your body's satiety cues won't be tuned in to those feelings of fullness yet and it's easier to overeat. Try slowing down by chewing each bite at least 10 times, putting your fork down in between bites, and fostering a relaxing eating environment rather than eating on the run.
--Erin Palinski-Wade
 

14. Outsmart your hunger hormone
Even the most motivated and focused dieter will struggle to be successful at weight loss once hunger takes over. Our bodies secrete a hormone called ghrelin, which controls hunger and drives our appetite. If we don't understand, monitor, and control our ghrelin, we can forget about losing weight. Science tells us that the best way to control ghrelin is to eat small, balanced meals about every 3 hours or so. That's because ghrelin will spike after about 3 to 4 hours of fasting, so eating with regularity helps keep this eating trigger at bay. Ghrelin will also spike if we're deprived of carbs, so it's important to give our bodies and brains the carb fuel they need. When we skip meals or avoid carbs, we're inviting ghrelin to spike, which increases and makes us feel emotionally hungry. It makes us crave sugar and can derail even the healthiest eating routine.
--Manuel Villacorta, RD, author of Eating Free: The Carb-Friendly Way to Lose Inches

15. Wear fitted clothing
The elastic waistband is the dieter's fashion enemy number one. When you wear clothes that fit well and make you feel good, you have awareness gauges that give you clear signals to help you put on the brakes as you fill up. Use this as a way of staying mindful of your goals and to help keep you from overeating.
--Wendy Bazilian, DrPH, author of The SuperFoodsRx Diet

Wednesday, January 22, 2014

101 Photoshop tips you have to know

Are your photo editing skills a little on the slow side? Could your Photoshop knowledge be better? If so, you’re in the right place. Below we’ve culled from experts 101 of the best Photoshop tips and tricks you need to streamline your photo editing skills and start working faster and smarter.

101 Photoshop tips you have to know

We’ve broken our list down into categories of Quick tips, Adobe Camera Raw and Bridge tips, Tips for using Layers, Tips for using Photoshop’s many tools and, finally, Tips for using Brushes. We hope our round-up of cunning techniques, shortcuts and cool effects gives you the help you need, and if you have a suggestion for something we missed… let us know!

Quick Photoshop Tips

Photoshop Tips: combine images with text

01 Combine images with text
There’s a really easy way to overlay an image on top of text. Drop an image layer over a type layer then hold down Alt and click the line between the two layers in the Layers Panel to clip the image to the text.


Photoshop Tips: rotating patterns

02 Rotating patterns
You can make amazing kaleidoscopic patterns with the help of a keyboard shortcut. Cmd/Ctrl+Shift+Alt+T lets you duplicate a layer and repeat a transformation in one go. To demonstrate, we’ve made a narrow glowing shape by squeezing a lens flare effect, but you can use any shape, image or effect you like. First, make an initial rotation by pressing 
Cmd/Ctrl+T and turning slightly, then hit Enter to apply. Next, press Cmd/Ctrl+Shift+Alt+T repeatedly to create a pattern (download our 50 free photo frames and borders for Photoshop and see which ones work best with your creations).


03 Bird’s Eye View
When zoomed in close, hold down H and drag in the image to instantly dart out to full screen then jump back to another area.


04 Quick full 
Layer Masks
You can Alt-click on the Layer Mask 
icon to add a full mask that hides everything on the layer.


05 Easier marquee selections
Hold down Alt to start a selection at the center point with any Marquee tool, and then hold Space to temporarily move the selection around.


Photoshop Tips: using backgrounds

06 Funky backgrounds
Want to change the default grey background to something more funky? Shift–click over the background area with the Paint Bucket tool to fill it with your foreground color. Right-click it to go back to grey.


07 1000 History states
Go to Edit>Preferences>Performance to change the number of History states up to a maximum of 1000. Beware though of the effect that this has on performance.


08 Color code layers
Use color coding to organize your Layers Panel. Right-click over a layer’s eye icon to quickly access 8 color code choices.


09 Close all images
To close all of your documents at the same time, Shift-click any image window’s close icon.


10 Spring-loaded Move
While using any tool, hold Cmd/Ctrl to temporarily switch to the Move tool. Release to go back to your original tool. Note that spring-loaded keyboard shortcuts work for other tool shortcuts, too.


11 Interactive Zoom
For interactive zooming, hold Cmd/Ctrl+Space then drag right to zoom in, or left to zoom out. The zoom targets where your mouse icon is, so it’s one of the quickest ways to navigate around an image.


12 Lightning fast 
layer copies
Hold down Cmd+Alt and drag any layer to instantly make a copy.


Photoshop Tips: diffuse effects

13 Diffuse effects
The Diffuse Glow filter can give highlights a soft ethereal feel, especially when you combine the effect with desaturation. Hit D to reset colors then go to Filter>Distort>Diffuse Glow. Keep the effect fairly subtle, then go to Image>Adjustments>Hue/Saturation and drop the saturation down to complete the dreamlike effect.


14 Undo, Undo, Undo
You probably know that 
Cmd/Ctrl+Z is Undo, but you may not know Cmd/Ctrl+Alt+Z lets you undo more than one history state.


15 Cycle Blend Modes
Shift + or – will cycle through different layer Blend Modes, so long as you don’t have a tool that uses Blend Mode options settings.


Tips 16-25: Essential Photoshop shortcuts
16 Cmd/Ctrl+Shift+Alt+E will merge a copy of all Layers
 

17 F Cycle through workspace backgrounds
 

18 X Change your foreground and background colors
 

19 D Reset foreground and background colors to black and white
 
20 ] and [ Change your brush tip size
 

21 Cmd/Ctrl+J Duplicate a layer or selection
 

22 Space Bar Hold Space and drag to navigate around the image
 

23 TAB Hides or shows all panels and tools
 

24 Cmd/Ctrl+T Transform a layer
 

25 Cmd/Ctrl+E Merge selected layer down, 
or merges several highlighted layers

Adobe Camera Raw and Bridge Tips

Photoshop Tips: Use select all
26 Use Select All
To quickly batch process a group of images, open them all in Adobe Camera Raw (the easiest way to do this is through Adobe Bridge) and then click Select All. Now, any changes you make to one image will be applied to all the open files.


27 Open Smart Objects
Hold down Shift in Adobe Camera Raw and the Open Image button switches to Open Object. Now the file opens as a Smart Object, which means you can double-click the layer thumbnail in Photoshop to go back and edit the layer in ACR.


Photoshop Tips: Use mask sharpening

28 Mask Sharpening
The Masking slider in the Detail Panel lets you control which areas of an image are sharpened, but it’s impossible to judge unless you hold down Alt as you drag. This displays a greyscale view, in which black areas are protected from sharpening, enabling you to isolate the sharpening to edge areas.


Photoshop Tips: reset the sliders quickly

29 Reset the sliders quickly
Double-click any slider to reset it to 0. If you click once, then the slider jumps to the point you’re over. So if you keep the mouse still, you can single-click, then double-click over a point for a quick ‘before and after’ view of any adjustment you’ve made.


Photoshop Tips: crop ratios

30 Crop ratios
Square crops can help to make your images stand out from the crowd. For a list of different crop ratios, hold down the mouse button over the Crop tool. Remember, like everything else in ACR, cropping is non-destructive, so you can try out different ratios and adjust the crop at any time.


31 Exposure before color
It’s always best to adjust exposure before you move on to color correction.


32 Adjustment Brush controls
The Adjustment Brush is perfect for selective toning in ACR. The brush works by setting pins, each linked to a painted mask that specifies the area you want to tweak. You’ll need to view the mask when painting, and hide it when using the sliders to adjust the area. Hit Y to switch the view of the mask on or off.


33 Erase masks
When painting with the Adjustment Brush, hold down Alt to erase parts of the mask.


34 Clip the blacks
Deep blacks give an image extra punch, so it’s okay to clip the blacks a little. For deep blacks, drag the Black point slider inwards while holding down Alt until a few dark spots appear.


35 Straighten horizons
Hold down A and drag a line to straighten your images.


36 Clipping views
Hold down Alt while dragging the Exposure, Blacks or Recovery slider to see any clipped pixels, or click the icons at the top right and left of the histogram to see them all the time.


37 Screen real estate
Make the most of your screen size by hitting F to switch the ACR display to Full Screen Mode.


38 3D carousel view
Hit Cmd/Ctrl+B to see your images in a snazzy 3D carousel. Scroll through the images with the left and right arrow keys and hit down to remove an image from the view.


Photoshop Tips: paste ACR settings

39 Paste ACR settings
You can copy ACR treatments from one file to another in Bridge. Right-click any file with the circular ACR icon, then go to Develop Settings>Copy Settings. Right-click another file (or hold down Cmd/Ctrl and click to
select more than one) then choose Paste settings.


Photoshop Tips: stack similar images

40 Stack similar images
Stacks can help you keep your workspace tidy and easier to navigate by grouping similar images together. Select a group of files (hold down Shift and click the first and last) then go to Stacks>Group as Stack.


41 Open in Adobe Camera Raw
Raw files open automatically into Adobe Camera Raw, but you can open JPEGs and TIFFs, too, by right-clicking them and choosing ‘Open in Camera Raw’, or simply hit Cmd/Ctrl+R.


Photoshop Tips: open as layers

42 Open as layers
You can load a group of images into layers of a single document by going to Tools>
Photoshop>Load Files into Photoshop Layers.


43 Step-by-step Solarization in Adobe Camera Raw
Photoshop Tips: Solarisation

01 Make a cone-shaped curve
Open an image in ACR, then click the Tone Curve Panel. Drag all the points off the curve to delete them, then make one single point in the middle. Drag this down, then drag the bottom left of the curve to line up to the top, making an inverted cone shape.

Photoshop Tips: Solarisation

02 Convert to mono
Click the HSL/Greyscale Panel and
check ‘Convert to Black and White’. Use the sliders to tweak the black and white conversion. If you want to add some color, go to Split Toning and adjust the sliders to add color to the shadows and highlights.

Photoshop Tips for using Layers

Photoshop Tips: how to use layers

44 Converting Layer Styles
Converting a Layer Style to a normal pixel-based layer gives you greater control to edit the contents. To do so, add a style then right-click Effects and choose Create Layer.


45 View one layer
If you’re working with  multiple layers and you want to view one layer on its own, there’s no need to hide all the others manually, simply hold down Alt and click the Eye icon of a layer to make every other layer invisible. Hold down Alt and click again to reveal them.


46 Invert a Layer Mask
After adding any Adjustment Layer, hit Cmd/Ctrl+I to invert the Layer Mask and quickly hide the effect, then paint back over the image with white to selectively reveal the adjustment.


47 Unlink layers and masks
You can move either a mask or an image independently of one another by clicking the link between the two thumbnails in the Layers Panel. Highlight the thumbnail you want to reposition, then grab the Move tool.


48 Quick copy
Hold down Alt and drag a mask, style or layer to quickly duplicate it.


49 Convert the Background
Double-click the Background Layer and hit OK to convert it to an editable layer.


50 Adjustments
Always use Adjustment Layers rather than directly editing a layer. This gives you three advantages: you can edit it at any time, control the strength with Opacity, and use a mask to make it work selectively.


51 Move query
When using the Move tool, right-click over a point in the image for a list of all the layers you’re hovering over.


52 Panel Options
The Layers Panel is the most important box in Photoshop, so you’ll want to make sure it’s set up properly for your needs. Choose Panel Options from the Fly-out menu to select different thumbnail sizes and content.


53 Move layers up or down
You can move layers up or down the stack in the Layers Panel while watching the image change. Hold down Cmd/Ctrl and press ] or [.
Add in Shift to move a layer right to the top or bottom.


54 Fill shortcuts
You can press Alt+Backspace to fill a layer or selection with the Foreground color, Cmd/Ctrl+Backspace to fill a layer or selection with the Background color, or Shift+Backspace to quickly access the Fill Options.


55 The 50% grey layer
A new layer filled with 50% grey is useful in lots of situations. For example, you can dodge and burn with it, add texture, or manipulate a Lens Flare effect, all in a completely non-destructive way. To create a 50% grey layer, make a new layer then go to Edit>Fill, then set the Blend Mode to Overlay.


56 Layer Group shortcut
Layer Groups are incredibly useful, but don’t bother clicking on the Layer Group icon, as you’ll have to add layers to the new group manually. Instead, you should highlight several layers and either drag them to this icon or alternatively hit Cmd/Ctrl+G.


Photoshop Tips: edit multiple type layers

57 Edit multiple type layers
To apply a change of font or size to multiple type layers at once, hold down Cmd/Ctrl and click the layers in the Layers Panel to highlight them, then simply select the Type tool and change the settings in the Options Bar.


Photoshop Tips: layer mask views

58 Layer Mask views
Hold down Alt and click a Layer Mask thumbnail to toggle between a view of the mask and the image. Hold down Shift and click to turn the mask on or off.


59 Select similar layers
To quickly select all layers of a similar kind, such as shape or type layers, highlight one of them and then go to Select>Similar Layers.


60 Change Opacity
When not using a painting tool, you can change layer Opacity simply by pressing a number key. Hit 1 for 10%, 5 for 50%, and 0 for 100%.


Photoshop Tips: quick masking

61 Quick masking
You may be familiar with Color Range in the Select drop-down menu. But did you know that you can access a similar command through the Color Range button in the Masks Panel? (Window>Masks). This allows you to quickly make a mask by sampling colors, which can be used for making a quick spot color effect.


62 Step-by-step Blend fire effects
Photoshop Tips: blend fire effects

01 Copy in the fire
Open our files ‘fire_before01’ and ‘fire_before02’, then grab the Move tool and check Auto-Select Layer and Show Transform Controls. Drag the fire image into the girl image to copy it in, then change the Blend Mode of the layer to Screen.


Photoshop Tips: blend fire effects

02 Position and warp
Click the bounding box to transform the fire layer, then resize, rotate and position the layer. Right-click while in Transform mode and choose Warp to wrap the fire around the body. Hit Cmd/Ctrl+J to copy the fire layer and transform again to build up the effect.

Tips for using Photoshop Tools

63 Right-click for contextual menus
Almost all tools have a contextual menu that’s accessed with a simple right-click. This usually gives you the tool’s major controls and a few handy shortcuts. As well as the tool you have active, where you right-click affects the menu, too. For example, a right-click over a layer thumbnail or mask thumbnail gives different options.


64 Speedy navigation
Being able to quickly and easily move around your image and zoom in or out will speed up your workflow more than anything else. Use Cmd/Ctrl and + to zoom in, Cmd/Ctrl and – to zoom out. Hold the space bar to temporarily access the Hand tool and drag around the image.


65 Crucial selection shortcuts
With any selection tool, hold Shift to add to an existing selection and Alt to subtract from it. Shift+Alt together allows you to intersect selections.


66 Paste in place
Cut and paste a selection to a new layer and Photoshop will place it in the middle of the screen. If you want to paste it to a new layer, but keep the position the same, use Cmd/Ctrl+X to cut and Cmd/Ctrl+Shift+V to paste in place. Similarly, you should hold down Shift while dragging layers between documents with the Move tool to keep the same position.


67 Hide the Marching Ants
Press Cmd/Ctrl+H to hide or reveal a selection’s ‘marching ants’ line. Cmd/Ctrl+Shift+H does the same for a Path line.


68 The amazing 
Cmd/Ctrl+click
Use the Cmd/Ctrl+click shortcut on any layer thumbnail, mask thumbnail, Channel or Path to load its shape or contents as a selection.


69 Switch lasso
When using the Lasso tool, hold Alt then release the mouse button to temporarily switch to the Polygonal Lasso tool.


70 Fixed Ratio selections
The Rectangular Marquee tool has a useful ‘Style’ setting in the Options Bar that lets you make a selection at a fixed ratio or size. This is helpful if you want to select a specific area to use as a wallpaper or for web pages.


71 Transform a selection
You can transform a selection in just the same way as a layer. Just go to Select>Transform Selection. Right-click to choose from familiar transform modes like Skew and Warp.


72 Pen tool rubber band
If you’re a newcomer to the Pen tool, it can be frustrating when plotting anchor points, as often you’re not entirely sure how your next curve will behave. There’s a useful feature hidden in the Options Bar that can be a godsend for beginners. Click the ‘Geometry options’ drop-down (next to Auto Add/Delete) and check Rubber Band. Now, as you use the Pen tool you’ll see an interactive preview of your next curve before you add it.


Photoshop Tips: non-destructive crops

73 Non-destructive crops
A little-known feature of the Crop tool allows you to hide, rather than delete cropped areas. To do this, you’ll need to make the Background Layer editable first, so double-click it then hit OK. Next, grab the Crop tool and drag a crop window, then instead of applying the crop, check Hide in the Options. Now you can re-crop at any time by dragging outside the window to reveal the previously cropped areas.

Photoshop Tips: tweak an anchor point 
74 Tweak anchor points
When using the Pen tool, hold down Cmd/Ctrl to temporarily switch to the Direct Selection tool. This lets you move anchor points and control handles.


75 Add a point
To add a point, hover over the existing path line and the Pen tool will automatically change to the Add Anchor Point tool.


76 Remove handles
Remove handles from a point and make it into a sharp angle by Alt-clicking over it.


77 From selection to path
Turn any active selection into a path by clicking the ‘Make Work path from Selection’ icon at the bottom of 
the Paths Panel.


78 Add handles
Add handles to a point by holding Alt then dragging outwards from the point


79 Path options
Once you’ve made a path with the Pen tool, right-click for lots of options, including Make Selection, Fill Path and Stroke Path.


80 Magnetic Pen
For a magnetic Pen tool that behaves just like the Magnetic Lasso tool, choose the free form Pen tool from the Tools Panel then check ‘Magnetic’ in the Options Bar.


81 Step-by-step Select sky with Channels
Photoshop Tips: select sky with channels

01 Copy Blue Channel
Go to Window Channel then drag the Blue Channel to the New Channel icon to duplicate it. Hit Cmd/Ctrl+L to access Levels, then drag the white and black point sliders in dramatically to make the sky totally white and the land black. Now use the Brush tool and paint with black to tidy any bits in the land.


Photoshop Tips: select sky with channels

02 Load a selection
Hold Cmd/Ctrl and click the Blue Copy Channel to load a selection of the white areas. Click back on the RGB Channel then go to the Layers Panel and add a Curves Adjustment Layer. The selection is automatically turned into a mask. Drag down on the curve to darken the sky.

Tips for using Brushes

82 Try Adobe Eazel
For tablet owners, Adobe Eazel is both fun and a serious painting tool. Finger-painted brush strokes have a fluidity that’s difficult to create on a computer. Wireless transmission between tablet and Photoshop streamlines the painting process.


83 Change the brush angle
When using a non-circular brush, you may find the need to change the angle of the brush tip. To do this, click the Brush Panel in the Options Bar then highlight Brush Tip shape and drag the circle to change the angle of the brush. You can also flip it horizontally or vertically with the check boxes.


84 Rotate the clone source
Clone around corners by rotating a clone source. To do so, use Shift+Alt+ < or >. It helps if you have Show Overlay checked in the Clone Source Panel, so that you can see the rotation.


85 Real paint ridges
The Bevel and Emboss filter is often used by digital painters to make brush strokes look like ridged layers of paint. Merge a copy of all the layers, then set the Blend Mode to Overlay and apply the Bevel and Emboss filter.


86 Interactive brush settings
When using the Brush tool, hold down Alt and the right mouse button for a preview of the Brush tip’s size and hardness. Drag down and up to increase or decrease hardness, and drag right or left to change the size.


Photoshop Tips: Tilt Canvas

87 Tilt Canvas
When painting, it’s often easier to rotate the canvas rather than try to bend your wrist into an uncomfortable position. Just as a sketcher would angle a piece of paper, you can angle your canvas by holding down R then dragging it around. Release R and you’ll flip back to your original tool. To revert back to normal, hold down R and click Reset View in the options.


Photoshop Tips: Smudge painting

88 Smudge painting
Smudge painting is quick and immensely satisfying. To paint with the Smudge tool, fill a layer with an off-white tone, duplicate the Background Layer and set it at the top of the stack, with Opacity at about 13%, then highlight the Smudge tool, check Sample All Layers, and start painting. It’s that simple.


Photoshop Tips: Add texture to paintings

89 Add texture to paintings
As a finishing touch, you can make your paintings look much more authentic by adding a paper texture. Copy a texture on top of your image, then experiment with Blend Modes and Opacity until you get the right effect. The Darken or Multiply modes will usually provide you with good results.


90 Draw straight lines
To draw a straight line with the Brush tool, hold down Shift and then click two points.


91 Sample a color
With the Brush tool selected, hold down Alt and click to sample a color and then set it as your Foreground color.


92 Precise painting
Press Caps Lock to switch your cursor to a cross hair.


93 Cycle through the brushes
Use , and . to cycle left or right through the brushes in the Brush Preset Picker.


94 Dodge or Burn
When painting with the Burn tool, you can hold down Alt to switch instantly to the Dodge tool.


95 Get a pen and tablet
If you’re into digital painting, but don’t own a graphics tablet, you’re missing out on a whole new world of creativity. There are plenty of good, entry-level tablets available, but if you want mid-range features that include multi-touch input, treat yourself to a Wacom Intuos 5.


96 Change hardness
As you probably know, the ] and [ bracket keys change your brush size, but you can also use Shift+ ] or [ to change the brush hardness.


97 Quick Opacity change
When using the Brush tool, press any number between 0 and 9 and the Brush Opacity will set to it. 1 for 10%, 9 for 90%, 0 for 100%. Press Shift and a number to adjust Flow.


98 Create a brush
You can create a brush tip from any image you like. Simply convert to monochrome, then make a selection and go to Edit>Define Brush Preset. Only dark parts are recorded; any parts that are pure white aren’t included in the brush tip. So if you want the shape of the brush to be clear, you need to isolate the object or shape against a white background.


Photoshop Tips: Make sketch lines

99 Make sketch lines
If you want to turn a photo into a painting, adding sketch lines can make the effect look more realistic. To do so, duplicate your layer then go to Filter>Stylize>
Glowing Edges, then invert the colors, desaturate and use the Darken or Multiply Blend Mode.


Photoshop Tips: Experiment

100 Experiment!
The Brush Panel is the control center for hundreds, if not thousands, of different brush effects and settings. The best way to find out how it works is to grab the Brush tool, choose a color, open a new document and start painting. To take it further, try painting on different layers and use different Blend Modes, or add Layer Style effects to your painted layer.


101 Step-by-step Quick brush effects
Photoshop Tips: Quick Brush effects

 01 Set up the Brush

Open your original image, then hit 
Cmd/Ctrl+J to duplicate the background. Load Square Brushes from the Brush Picker drop-down menu. Select a square brush, then open the Brush Panel and use these settings: Brush tip shape: Spacing 631%. Shape Dynamics: Size, Angle, Roundness Jitter – all 100%. Scattering: Scatter 638%, Count Jitter 50%. Color Dynamics: Foreground/Background Jitter 20%, Saturation Jitter 20%. Brightness 30%.


Photoshop Tips: Quick Brush effects

02 Paint mask and colors

Use the Lasso tool to select the girl 
then hit Shift+Backspace and choose Fill: Content-Aware. Hold down Alt and click the Add Layer Mask icon then set Foreground color to white and paint on the mask over the girl to hide parts of the body. Next, add a new empty layer and hold down Alt to sample colors from the girl, then paint to add colored fragments. Add a second new layer, paint larger strokes, then blur slightly with Filter>
Gaussian Blur.