Thursday, July 31, 2014

Everything You Never Knew You Needed To Know About Bras

This post is brought to you by: EPBOT

I'm about to get as girly as this blog has ever been, guys, so fellas? Yes, you - I know you're out there! Yeah, look, unless you're a guy who likes reading about lady boobs and lingerie, you may want to skip this one. Although I promise to throw in some fun geeky bras every now and then, just to keep it interesting:

 Handpainted Starfleet Uniform Bra, $35 from SceeneShoes

See?
Ok, so, the other night I was following a rabbit trail of web links - like you do - and I ended up on this fascinating Reddit forum about bras. And when I say "fascinating," I mean I stayed up until 3AM reading, because holy WOW how did I not know this stuff before?

You know how you always hear that something like 90% of women wear the wrong size bra? I'd heard that, too, but never thought much of it. Sure, my bra straps were constantly falling down and the wires were always jabbing me in the sides and I'd been convinced I was just shaped like a mutant for most of my life, but GOSH DARN IT I WAS ONE OF THE 10% GETTING IT RIGHT. Right?

Wrong.

Did you know that a bra's cup size changes with its band size? So a 34D's cup is a fraction of the size of a 40D's cup? This seems blindingly obvious now, but I promise you I HAD NO IDEA. I think I've just been programmed since my Barbie-playing days that D = ginormous boobs, so I never bothered to think beyond that.


"MARVEL-OUS in Black" Bra, $65 from MeganElizabeth31

More stuff I learned:

- There are something called "sister sizes," or bra sizes that hold equal amounts of mass. For example, a 34D is roughly equal to a 36C, in as far as how much boobage mass they will hold. Here's a handy visual guide of sister sizes, plus other band-to-bust ratios:


It took me about five solid minutes of staring at that graphic to make any sense of it, but once you get it, it's great info to have  - especially if you're in-between band sizes like me.

- If you bend at the waist to adjust yourself with the "scoop & swoop" method, you can INSTANTLY become at least a full cup size bigger. (Hit that link for some impressive, NSFW before-and-after photos.) I tried this, and I can assure you: it totally works.

- There are generally two kinds of breast shapes: full-on-top and full-on-the-bottom. If you're full-on-the-bottom like me, you may have been fooled into thinking a bra's cup size was too large for you, simply because it gaped at the top like so:


NOT SO. Some bras are simply made to fit full-on-the-top ladies, while others fit full-on-the-bottom or both shapes. Head over to Bras I Hate for the whole post explaining the two shapes, plus plenty of helpful visuals like that one.

This next one is one of my favorite bits:

- A lot of armpit flab and folds are actually breast tissue being smashed upward by an ill-fitting bra. Ditto for back folds. So a properly fitted bra could actually eliminate some or all of your arm flab and back folds. (Great example in the 3rd set of photos here.)

Here's the most important take-away, though:

- The vast majority of women are wearing bras that are too big in the band size, and too small (by far) in the cup size.

So after reading this excellent and easy guide for measuring yourself, I decided to measure myself. (It's just two measurements - easy peasy.) Then I plugged in the numbers to the bra calculator she links to and did a quadruple take. Then I went back and measured myself again because there was NO WAY I was the size it claimed. Then I did the numbers manually, using the graph in the same post. Same results.

After the third measuring & calculating I finally gave up and decided to just go bra shopping. The proof is in the pudding, right? (Or in this case, the padding?)

Ok, so now let's get nitty-gritty, girls. LET'S TALK NUMBERS.

For the past few years I've been bumping up my band size, even though my weight has been the same. I could tell something wasn't fitting, what with the wires jabbing me and the gore* floating off my chest, but since I've never had much in the tracts of land department, I figured the band size was the only thing I could increase. So, I went from a 36B to all 38Bs.

[*Technical term! That's the bridge between cups at the front. See? I told you I learned stuff!]

Today I brought home 4 new bras that fit me just about perfectly. They're way more comfortable than my 38Bs, and they look about a million times better, too. Guess what size they are?  

34D.

34 FREAKING D, you guys. And on some of those the cups are a smidge too small, but YOU try finding a 34DD at Ross or Marshall's. (The calculator actually tried to tell me I need a DDD, but since I'd have to order those online I think I'll start with these and reassess in a few months. According to the forum I might need a larger cup size then due to tissue migration, anyway.)

How did I go from a 38B to a 34D? Simple. I put the bra on, bent at the waist, and scooped and adjusted until everything was up front and in place. Then I stood upright and goggled at my new found acreage.

Believe it or not, I really was adjusting each time I suited up in my bras before - but not with the bending-at-the-waist, "scoop & swoop" method. That part is totally key. Turns out gravity is a powerful ally!

You're probably thinking I can't breathe in my new bras, or that they're tight enough to make a Victorian lady gasp. Nope! They're snug, sure, but I can easily fit several fingers under the band. I actually measure exactly 35 inches, so I have to wear the 34s on the last hook - but that's good! See, another thing I learned: you should always buy bras that fit on the *last* hook, so you have room to tighten them as they stretch out over time. Again, that seems so obvious now - so why wasn't I doing it before?!

(Because of the sister-sizes thing, I also picked up two 36C bras. They only fit on the tightest hooks, so they won't last as long as the 34Ds, but they're great for now.)

Another benefit of the smaller bands: there's not as much weight on my shoulder straps. I'm hoping that means the straps won't be falling down as much, although only time will tell.


 Rapunzel Bra Top, $48 by ElectricAveCreations
(I'm not usually one for frilly bras, but seriously: How cute is this?)

Ok, ladies, so now it's your turn: Go measure yourself using this post as a guide. DO IT. Do it now!! Then go try on whatever bra size the post's calculator or graph tells you to.

When you first try the new size on, it will feel too tight in the band and too big in the cup. DON'T PANIC. Just bend and scoop, baby! YEAH! (Sorry. Austin Power's moment.) And don't be surprised if your cups runneth over once you straighten up again!

Believe it or not, I've only scratched the surface of bra anatomy, so you should really head over to that forum, A Bra That Fits, to explore and learn more for yourself. Check the sidebar for all the basics and more helpful guides like what I've listed here. Then go learn about tissue migration, shallow breasts, how to spot a proper fit, and all the rest! I'm telling you, there's at LEAST enough there to keep you reading 'til 3AM.

Wednesday, July 30, 2014

Full Body Fat Blaster (Exercises)

This post is brought to you by: Kama Fitness

Time to get into this butt kicking 12 minute workout.

When I did this workout – it really killed my quads & stupid me did this workout after chest day…{Oh Well}

Get.ready.to.sweat.

What You’ll Need:

+ Gymboss Interval Timer + exercise mat

The Workout

Set your timer for a 12 minute countdown.

Complete the following reps for each exercise in the exact order below. (this is one round)

Aim for as many rounds as possible in 12 minutes (AMRAP)

20 Jumping Jacks
5 Push Ups
20 Prisoner Jump Squats
5 Burpees


Full Body Fat Blaster Workout | Bodyweight Workout | Kama Fitness

The Exercises Explained

JUMPING JACKS: Do I really? I’m sure we all know this one ;)

PUSH UPS: Palms to the ground & hold yourself in a plank position. Bend your elbows, lowering your chest to the floor & push yourself back up to starting position.

PRISONER JUMP SQUATS: Begin standing with your hands behind your head. (come on, like you’re in prison!) Bend your knees, lowering your hips and jump up as high as you can, landing softly on your feet while keeping your core tight the entire time.

*Remember, keep your hands behind your head.


BURPEES: Begin in the standing position, bend your knees, push your hips back and bring your palms to the ground in front of your toes. Jump backwards with your legs as you hold your upper body with straight arms – carrying your weight in your shoulders. Now you are in the push up position. Immediately bring your knees back into your chest, feet flat on the ground and jump as high as you can from the crouching position.
This workout is such a full body kill. The best part for me were the jump squats going into the burpees & by best, I of course mean worst!
How’s your motivation level lately?

Tuesday, July 29, 2014

How to Clean Your Whole House Without Nasty Chemicals

This blog is brought to you by: Red and Honey


When I got married six and a half years ago, I honestly didn’t care what was in my cleaning products. We lived in an old apartment full of character and cobwebs, and I considered bleach my new best friend.  When I began having children I began to think twice about the products in our home. Surely the things we breathe and come into contact with on a daily basis would affect our health, right?  I bought things with words like “organic” and “natural” and “pure” on the labels, but I was fairly certain I was being sold a lie (and, at least some of the time, I was).

And then my son was born sensitive to just about anything unnatural and we began switching full force to safe, non-toxic everything.  I am so glad we did.

My new rule of thumb is that my cleaning products shouldn’t be more dangerous than the problem I am trying to solve.  So I may use bleach to kill mold, but I won’t use it to make my white’s whiter.  Here is how I clean my whole house without nasty chemicals.

All Purpose cleaner:   Most things can be cleaned with a bucket full of warm water with either a squirt of a good, safe, non-toxic dish soap or a splash of vinegar.  Either of these solutions are great for cleaning cabinets and walls, the inside of your refrigerator, and nearly any hard household surface that just needs a gentle cleaning.

Windows: I clean windows with a spray bottle full of vinegar diluted half and half with water.

Mini Blinds: Clean vinyl mini-blinds with a natural dish soap and some vinegar.  I’ve shared before how exactly I do this on my own blog.  You can read that here.

Floors:  I mop my tile and laminate floors by adding a big splash of vinegar and a few drops of a favorite essential oil to a bucket of warm water.  The vinegar smell will disappear as your floors dry.  I promise your house won’t smell vinegary when you’re done!

Wood:  Sealed wood can be polished with a soft cloth with a tiny bit of vinegar and olive oil on it.

Mattresses and upholstered furniture:  To freshen your mattress or sofa, put some baking soda into a cheese shaker (or a mason jar with holes nailed into the lid) and add a few drops of a favorite essential oil (lavender will encourage good sleep, tea tree oil will deter bugs!) and sprinkle the mixture onto your mattress or sofa and leave it for an hour or so before vacuuming the solution up.


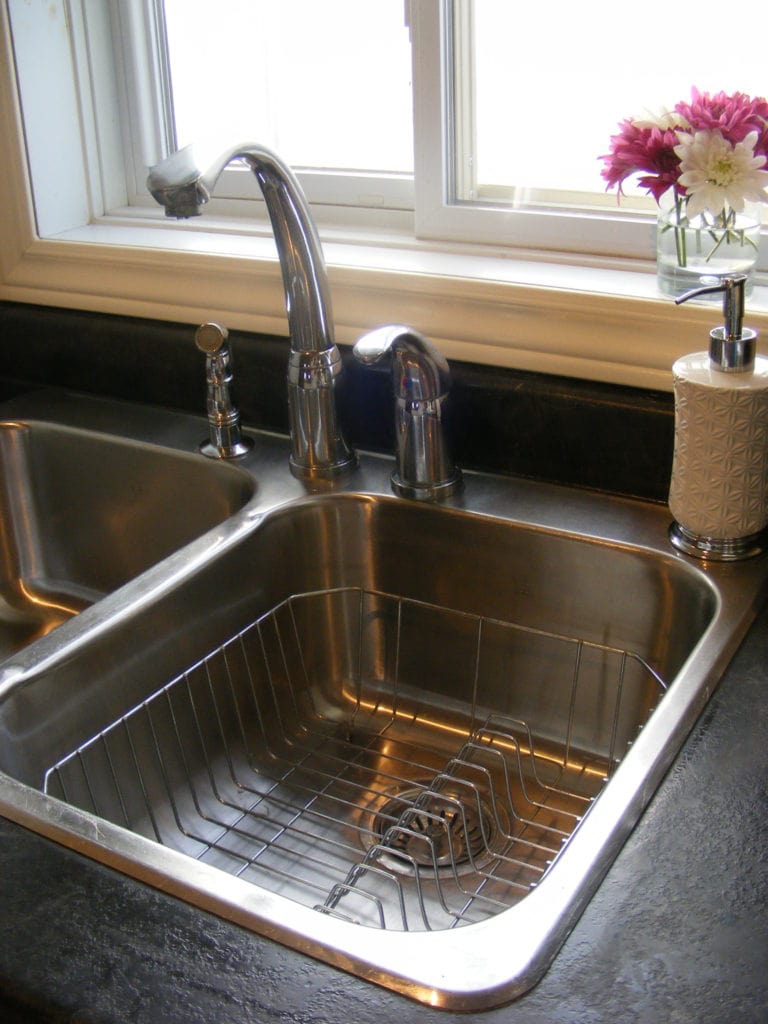
Sinks:  Step One: Fill the sink to the brim with hot water and at least a cup of vinegar. Let sit for about half an hour.  Go browse Pinterest for half an hour and if you start to feel bad about not doing anything productive, remind yourself that you are actually cleaning the sink!

Step Two: Mix baking soda and water to make a thin paste.  Use a soft scrubby sponge to scrub the sink with this solution.


Step Three:  Place a small amount of olive oil on a soft rag and rub your sink down with the olive oil.  This will make your sink shiny and beautiful.

Step Four: For stuck on soap scum or water scale, I use one of the nylon pan scrapers that comes with a pampered chef stoneware.  These little brown scrapers are seriously handy items!  I also use this thing to clean any gunk that gathers where the sink edge meets the counter top.


Don't obsess over it.  Your sink really doesn't need to be perfect. Just clean and shiny

Drains:    To remove smells from stinky drains, sprinkle some baking soda down a stinky drain and follow with a couple cups of warm vinegar (you can kill two birds with one stone by doing this with the hot vinegar created by cleaning your microwave or kettle as detailed below)

Microwave: Put 1 cup of vinegar in a glass microwaveable bowl and microwave it on high until it’s boiling and has covered the walls of the microwave in vinegary condensation (this takes about 5 minutes in mine).  Let sit 3 minutes. Carefully remove the bowl of vinegar.  With a cloth or paper towel, wipe the surfaces clean.  This is so easy and it works really really well.

Kettle: To descale your kettle, put enough vinegar in it to cover the lime scale and mineral deposits. Boil the vinegar in the kettle, and then rinse the kettle well.

Heavy Duty Cleaner for cooked on stove top gunk and any other hard to clean messes:  Mix some baking soda in a small bowl with enough hydrogen peroxide to make a paste.  Use a scrubby sponge to scrub the mess away.  If you have sensitive skin you may want to wear rubber gloves.  Try this on rust stains, soap scum and dirty grout lines.


Oven:  Oven cleaner was the last cleaner I eliminated and the one I was most uncomfortable using in my home.  I kept trying homemade solutions, discovering they didn’t work, and then going out and buying the can of spray on oven cleaner that works wonders but left me nervous to let my children breathe the air in our home!

The best natural oven cleaner I’ve found is Shaklee’s Scour Off. It works noticeably better than any of the homemade solutions I’ve tried.  If you’d prefer a homemade cleaner, the Heavy Duty Cleaner listed above works pretty well with a generous dose of elbow grease.


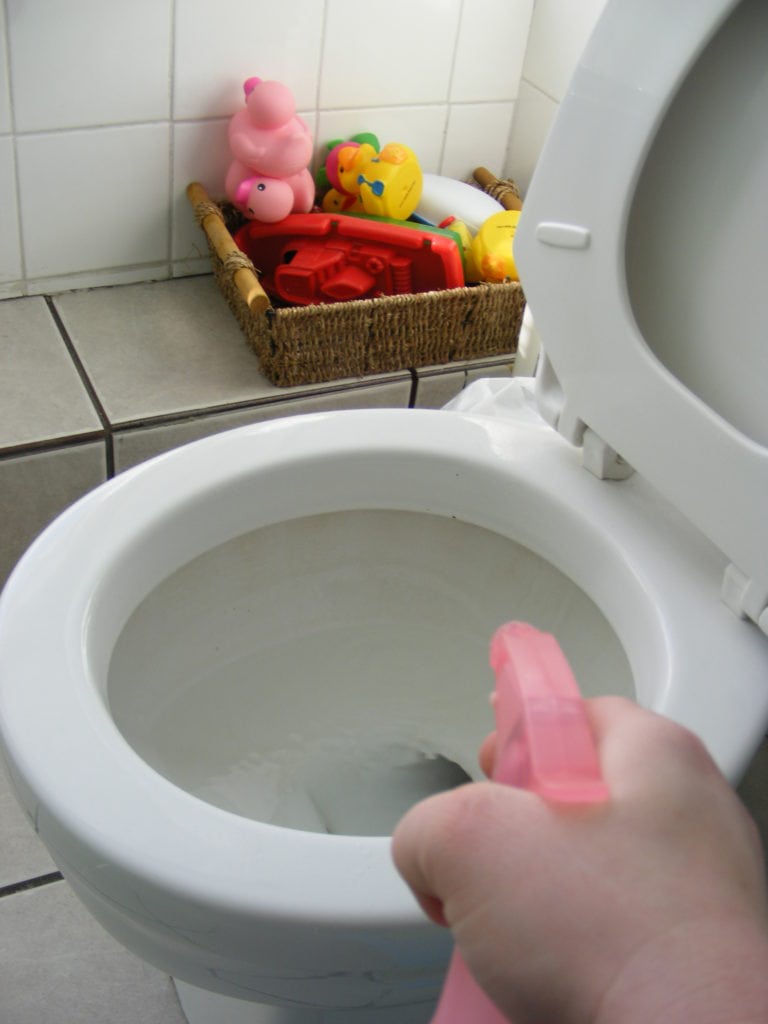
Toilets:  What I liked about commercial toilet cleaners was the special bottle design that allowed me to get the cleaner right up under the rim of the bowl!  You can accomplish this by putting straight vinegar in a regular spray bottle with the nozzle set to stream instead of mist.  Squirt the vinegar right up under the rim where you need it and then scrub the bowl with a toilet brush as usual and flush.

Disinfectant:  Tea tree oil, sometimes called melaleuca oil, has antibacterial qualities. I place some in a spray bottle filled with water when I feel the need to disinfect something.  It also deters head lice, so I actually spray my children’s hair with this same solution when we leave for church on Sunday mornings!

Keep in mind that tea tree oil is toxic when swallowed. While I consider it reasonably safe to use around the house, you do want to keep it away from curious little hands!  I suppose that goes for all home cleaning supplies, natural or not!

I love knowing that the products that come through the door to our home are safe and friendly and that the air we breathe is clean. 

Happy Cleaning!

Monday, July 28, 2014

How to Naturally Clean Any Washing Machine

This blog is brought to you by: Clean Mama

How to Naturally Clean Any Washing Machine via Clean Mama

If you’ve ever wondered why your washing machine smelled funny or if you should be cleaning it, you need to clean it.  If you haven’t ever wondered about cleaning this hard-working appliance, you still need to clean it.  Add this simple step to your laundry process and you’ll have fresh smelling laundry AND an odor-less washing machine.

You can clean a top loading or front loading machine with white vinegar or bleach.  My preference is to use either white vinegar OR non-chlorinated bleach because they are safe, all-natural solutions, but some washing machine manufacturers recommend only using chlorinated bleach.  Most importantly, follow the instructions for your specific machine or try one of these natural methods. 

Top Load
 How to Naturally Clean Any Washing Machine - Top Loading via Clean Mama
Cleaning your top loading washing machine is simple, all you really need is white vinegar and some cleaning cloths.  Worried that your laundry room will smell like a pickle?  Once the rinse cycle runs you won’t smell the vinegar.
  • Start by setting your washer to its hottest temperature, highest capacity and longest cycle.
  • Add four cups of white vinegar to the hot water, close the lid and allow it to agitate for several minutes.
  • Open the lid or pause/stop the machine and allow it to sit for an hour so that the vinegar can do its job to get rid of the bacteria, mold and mildew and the hoses of your machine.
After you have run a complete cycle with the vinegar solution, you can repeat the process if your washing machine is extra dirty.  The vinegar does a great job of removing any buildup, not to mention softening any soap scum and other residue that may be in the washer and hoses. Let your machine agitate the solution for several minutes and open the lid.

While you allow this solution to sit for an hour, it’s time to tackle the exterior of the washer as well as the fabric softener and bleach reservoirs. Using a cleaning rag or microfiber cloth, dip it in the vinegar solution and wring it out. Wipe down the exterior, lid and control panel, taking care to not get it too wet.  Remove the bleach reservoir and wipe down around the area where scum and dirt tends to collect.  Rinse your cloth and remove the softener reservoir from the machine and wipe the exterior and interior of it as well.  Close the lid and allow the washer to complete its cycle.

(HE) Front Load or (HE) Top Load
How to Naturally Clean Any Washing Machine - Front Loading (HE) via Clean Mama
Front load washing machines are relatively new on the home appliance market and have quickly gained popularity for their efficiency and cleaning abilities. Despite all the benefits they have to offer, there is one common complaint that seems to plague owners: stinky laundry. Wiping down the interior of the washer with cleaner, using extra detergent or running everything on the longest, hottest cycle does nothing to help dissipate the scent. However, one simple cleaning task will not only eliminate the issue, it will keep your washer in tip-top condition.

HE washing machines use less water and less energy which in turn can result in more mildew, mold, detergent residue and buildup in your washer. Some washers have a separate cleaning cycle as an option – I have that on my washing machine and run that cycle after I wash cleaning rags every week.  I’m pretty sure that that is the secret to a non-smelly HE washing machine.

The best way to clean your front loading washer is simple:
  • Select the hot water setting. If your machine does not have a hot water setting, then select a “white” or a “stain” cycle setting.
  • Select the “extra rinse” option if your washer has that choice.
  • Add ¾  cup of white vinegar OR ¾ cup non-chlorinated bleach (not both!) to the bleach dispenser or fill to its max level.
  • Allow the cycle to run until it has completed.
  • To ensure that no vinegar remains in your washer, manually select an additional rinse cycle if your washer does not have a 2nd rinse cycle selection.
After you have finished washing the interior of the washer, take a couple minutes to clean the bleach and fabric softener dispensers. These can be easily cleaned by simply removing and washing in warm, soapy water to remove any residue or by wiping them down with white vinegar on a cleaning cloth. Rinse and dry them thoroughly before reinserting them.

Make sure you wipe down the rubber seal on the door as it is a perfect hiding spot for mold and mildew. Carefully pull back the rubber gasket and inspect to see if you have mold, mildew or socks (as is the case with mine). Carefully wipe down the area with white vinegar and a soft, white cleaning cloth. Rinse with a cloth dampened with water and dry thoroughly with a clean cloth to prevent any moisture build-up.

After cleaning these three zones, you can wipe down the exterior and control panel with a gentle all-purpose cleaning spray to remove any dust and dirt buildup. Maintaining a clean washer and eliminating the stinky laundry issue is simple.

My number one maintenance tip? Be sure to leave the door open to prevent moisture build-up in between loads and clean it inside and out every month.

Sunday, July 27, 2014

Spring Beauty Alert! Natural Oils for Every Skin Type

This blog is brought to you by: Glamour

From argan to coconut, natural oils are totally having a moment. So which trendy, all-powerful oil is right for your skin type? We spoke with Dr. Joshua Zeichner, director of cosmetic and clinical research in the Department of Dermatology at Mount Sinai Medical Center, to come up with this handy-dandy guide. 

 Glamour-skincare-chart2

Here's a bit more info about the natural oils in each category, from Dr. Zeichner: 

On anti-aging:
"Oils used to prevent skin aging are rich in fatty acids and antioxidants. Omega-3 fatty acids are used by skin cells to make healthy membranes, reduce inflammation, and promote healthy collagen. Antioxidants such as vitamin E prevent free-radical damage from UV light exposure and help maintain healthy collagen and elastin."


On adding moisture:
"Healthy fats are not only good to eat but also to help hydrate your skin. When applied to dry skin, oils such as olive oil can soothe without causing irritation or allergies. Avocado oil is rich in vitamins, fatty acids, and antioxidants, especially vitamin E. It can help repair the skin barrier and act as a natural skin emollient. Avocados have high levels of sterols, which are natural fats in plants, which can soothe irritated skin. While coconut and avocado oil can soothe irritated skin, they can cause breakouts and should be avoided in acne-prone patients. Both olive oil and coconut oil can soothe and hydrate eczema, but coconut oil has the added benefit of helping to reduce bacteria on the skin."


On problem-solvers:
"While using an oil on already oily, acne-prone skin seems counter intuitive, many of the cosmetic-grade oils are quite light and do not clog pores. Tea tree oil and grapeseed extract have antiseptic properties, explaining their help in treating acne. Peppermint oil has been shown to help treat digestive issues, but is used on the skin because of its anti-inflammatory, helping to reduce redness. Rose hip oil is rich in essential fatty acids and vitamin A, which can help explain its effect on scars."


On calming the skin:
"Natural oils are a perfect match for sensitive or irritated skin because they rarely cause allergic reactions. Without chemical ingredients that many sensitive patients cannot tolerate, these oils can calm and repair the skin. Chamomile oil possesses anti-inflammatory and antiseptic properties, which can calm the skin and fight off infection. Carrot seed oil is rich in vitamin A and beta carotene and emollients, which help normalize skin cell turnover and soothe the skin. Evening primrose oil has long been used to treat eczema, especially in folk and alternative medicine. It contains high levels of essential fatty acids that soothe the skin."

Saturday, July 26, 2014

The Very Best Homemade DIY Ant Killer

This blog is brought to you by: CreekLineHouse

You won't believe how easy it is to get rid of ants for good! 

I don’t know about you, but around this time every year, I seem to get ants popping up around the house. Sometimes there are a whole bunch of them, sometimes it’s just a few, but they always show up. Maybe it has something to do with the fact that this is an old house and there are probably lots of little holes in the walls for them to get through. This easy homemade ant killing solution has been just the ticket to solve this pest problem for me.

This year, I’ve only seen a few in my bathroom. Last year though, our living room was practically taken over all of a sudden. Someone must have dropped a piece of cookie one day and that was it. They were coming from a corner of the room and no amount of cleaning or squashing could keep them from coming back. For some reason, I just can never bring myself to put out those scary poisonous-looking ant traps that you can buy in stores. They freak me out, so I’ve always just kind of suffered with ants and tried to squish them as I saw them. Then I discovered this magical little recipe and they were gone within 24 hours. Completely. And they haven’t been back to the living room this year either.


It’s so simple but so powerful.

You’ll need:
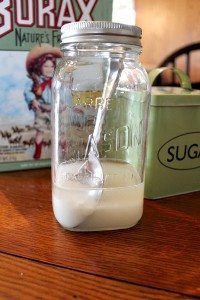
1 cup of sugar
1/2 cup of water
1 Tablespoon of Borax.


Mix it all together and you’re ready to take action!

If you have pets or kids, you’ll want to keep the solution away from them. One idea is to put it in an old plastic container with holes poked in the lid for the ants to get in and put a little bit of plain sugar water (no Borax) outside of the container to lure the ants over.

Since we still have these old peel ‘n stick floors here’s what I do:


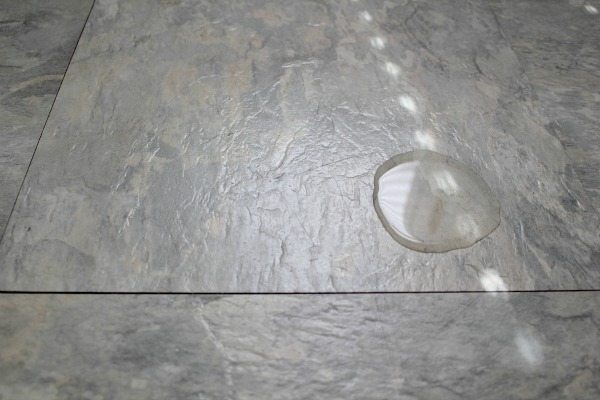
 I pour a little puddle of the killing juice on the floor…


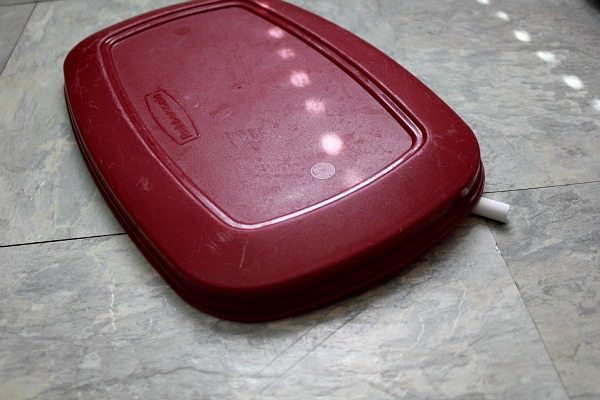
Then I take an old Tupperware lid and place it over top. I propped it up with a little piece of chalk to give the ants enough room to get in.

However you set up your solution, you’ll want to place it right where you previously saw the ants walking to be sure they find it. Once they do, they’ll go get all their buddies and they’ll all carry it back to the nest. 

Everyone will party and have a big feast and then they’ll die.

OK, now it’s sounding really mean and cruel, but trust me, you’ll be glad you won’t be worrying about ants again this year!

Friday, July 25, 2014

Organic Homemade Weed Killer for Getting Rid of Poison Ivy

This blog is brought to you by: AskJoAnne

Every year our shady New England property is over-run with poison ivy. It grows along the roadway, the driveway, the paths in the woods, and in among the ground cover plants.

My husband usually uses Brush-b-Gon spray to get rid of it. However, that not only requires repeated applications, but also uses a very toxic herbicide. Also, the application of the spray needs to be done on a day with low wind and when rain is not predicted.

Locally, Brush-b-Gon costs about $19 per quart and due to the need for repeated applications, it can become a very expensive solution. So I decided to find a less expensive and less toxic way to get rid of poison ivy.

Vinegar Weed Killer

After doing a little bit of research online, I found that Vinegar is actually a very effective weed killer. Another effective weed killer is salt.

Be aware however, that this recipe will kill ALL plants and not just the poison ivy weeds.
Start with an empty spray bottle that you can get from the hardware store.

Fill it nearly full with white vinegar.

Add about 1/3 cup of salt, shake to disolve.

Add about 1 Tbs of dish soap (this helps the solution stick to the leaves)

Shake again and you're ready to spray.
Natural Week Killer

Natural Vinegar & Salt Weed Killer


Make sure the spray is set to a narrow spray so that you don't kill everything surrounding the poison ivy as well.

This spray works best on warm days when the leaves will be exposed to some sunlight.

It's also best to spray when it's not too windy and when rain is not predicted.

It will work in less ideal circumstances, but warm, clear, dry, and no-wind are the best.

Homemade Weed Killer - Vinegar & Salt

After you spray, just let the solution do it's work. In some cases, when you check back, the poison ivy will have disappeared entirely.

In other cases, you will see the leaves looking burned and dried.
Be aware that too much vinegar will change the pH of your soil to be more alkaline. Also, too much salt will keep anything at all from growing. However, when you consider the primary ingredient in Brush-b-gon is Triclopyr, which, according to Wikipedia:
Triclopyr breaks down in soil with a half-life of between 30 and 90 days. One of the byproducts of breakdown, trichloropyridinol, remains in the soil for up to a year. Triclopyr degrades rapidly in water. It remains active in decaying vegetation for about 3 months.
Vinegar and Salt weed killer seems much less toxic.