How many of my readers LOVE to go camping but HATE having to hold it till you get to the nearest store or having to squat in the bushes?? Well, I'm bringing you a DIY on how to build your own camping toilet.
This DIY is brought to you by:
Mr. Homegrown
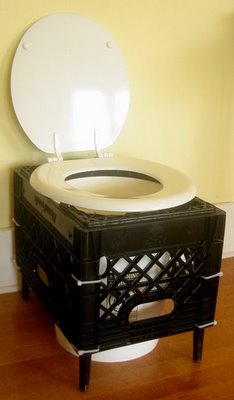
Putting this toilet together takes just a few minutes. First, find a
milk or beer crate and a five gallon bucket. Make sure that the crate
you use is large enough to accommodate the bucket. And note, I know of
someone arrested for scavenging beer crates behind a strip club, of all
places, so be discreet or ask for permission.
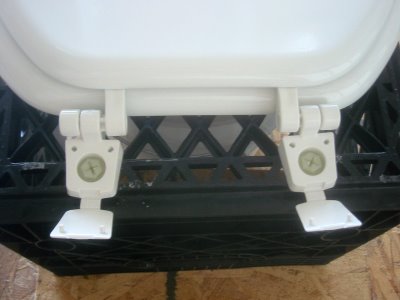 Attaching the Toilet Seat to the Crate
Next, find a toilet seat. Forage one or pick up a cheap seat at your
local hardware store. In an emergency situation, you could also use the
one on your regular toilet and simply bolt it back on when the zombie
threat has passed and the sewage pipes are flowing again. To attach the
seat to the milk crate simply position the plastic bolts and nuts that
come with the lid in the center and on the short end of the bottom of
the crate. Don’t over tighten.
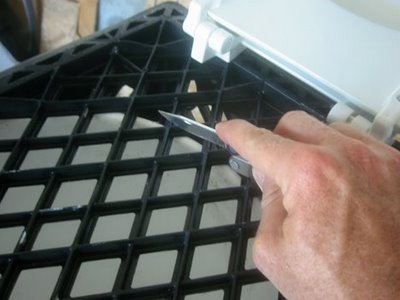
Cutting Out a Hole in the Crate
Place the bucket so that it will be appropriately positioned under the
seat. Mark the outline of the bucket on the crate with a knife and cut
out a circle with a jigsaw or keyhole saw so that the bucket will fit
through the former bottom of the crate.
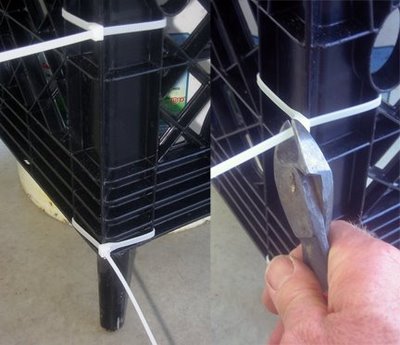
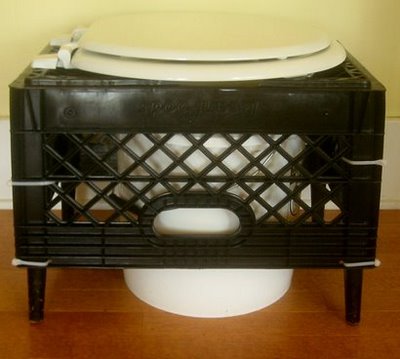
Attaching Legs to the Crate with Cable Ties
Cut four pieces of scrap wood (we found some old table legs for a more
finished look), and attach them to each corner of the crate so that the
bucket projects about a 1/2-inch above the level of the crate. The legs
will be approximately 13 1/2-inches. Make sure that the toilet seat will
fit snugly against the top of the bucket. We attached the legs with
cable ties, but you could also use screws or bolts.
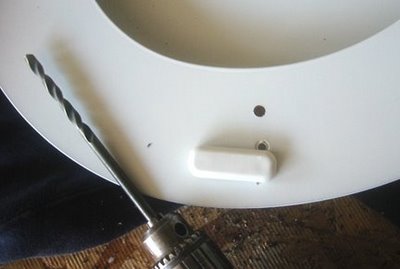
Moving the Spacer
The last step is to move the spacer on the bottom of the lid, so that it
does not hit the top of the bucket. Pop it out with a knife or chisel,
drill another hole, and reposition.
Your camping toilet is now done and ready for use. Simply lift the
crate off the bucket when it comes time to empty the contents.
This toilet is simple to make, easy to clean, and is made of readily
available materials. I think this particular design will be useful in
emergencies!
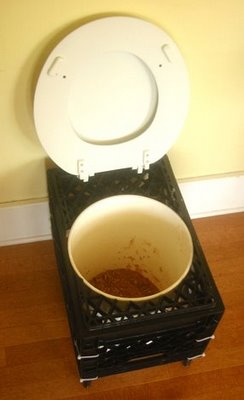
*Not sure if that is actual waste in the toilet or not*

Im no expert, but I believe you just made an excellent point. You certainly fully understand what youre speaking about, and I can truly get behind that. Toilet problems
ReplyDeleteFlawless and amazing online journal!
ReplyDeleteToilets Zones
This opulent, contemporary one-piece toilet has dual flushing and a soft-close seat, making it an easily accessible toilet. This type is a WaterSense toilet, using only 1.6 gallons each flush. A robust flush system combined with a glass trap way ensures that each flush is clean. While conserving water, a clean flush is ensured.
ReplyDeleteThis compact yet powerful toilet benefits from siphon flushing, making it a popular choice for household use. Its one-of-a-kind design makes the toilet easy to clean and maintain and provides a perfect comfortable height. It is a fantastic choice for residential houses to add a bit of elegance, whether tall or short. Flushing is quiet and straightforward; no more waking up the place with flushing noises in the middle of the night.
Best Comfort Height Toilets
Best Handheld Shower Head for Pleasure