
This blog is brought to you by: Sugar Bee Crafts
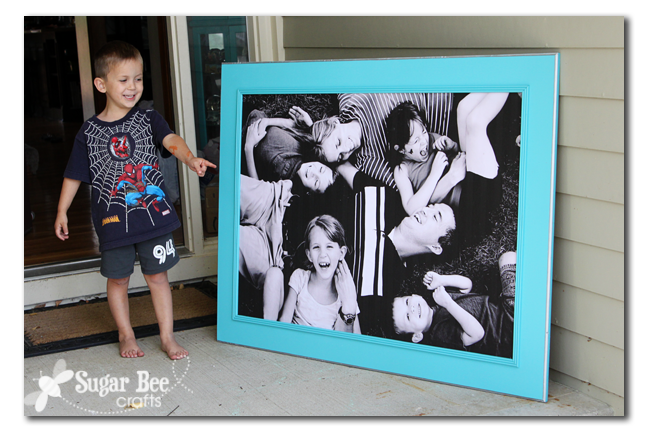
I posted awhile an image that showed off the giant picture I made for my girls' room - finally, the tutorial is here! It was so cheap
- around $13 (that's $8 for the print, and another $5 worth of an $11
foam board because you won't need to use the whole board....)

UPDATE Sept 2012: - - I
LOVE this project so much that I made another one for my Dining Room -
and this time I mounted it on plywood. Get details and a tutorial for
mounting on plywood at this link: Giant Picture for Cheap, take 2

First, I saw on IAmMommaHearMeRoar that
you could make big prints at office stores (Office Max, Office Depot)
for cheap - just ask for the "Engineer's Print". Awesome. The only
downside is it is in black-and-white, but I liked that, so it wasn't a
problem.
So here we go, on to the tutorial- -
This will be a black and white photo, so make sure there aren't too many
details or a busy background. Natural lighting is best you take the
picture. I had my girls go outside before school so I could get a good
snapshot of them in natural light - then I used photoshop to turn it
black and white.

I put the image on a jump drive data stick thingy and took it with me to the office store. I'm sure you could email them the image as well.
They warned me that it wouldn't be "photo-quality" - - but hey, for $8, it was good enough for me!
I snapped a quick picture of the picture so you can see the quality -- up close it's not dead-on crisp, but who's looking that close anyways. And it's not pixely at all...this is the bangs of the daughter on the right...

Update: Some readers have reported that their office store will no longer do a photo as an Engineer print - I hope that's not widespread, because these are AWESOME.
Now that you have your picture, you'll need to put it on something.
You will need to buy foam board for the picture. Kind of like the foamboard that you use like poster board, but bigger. And where do you get one that big?? Home Depot/Lowe's - yep, it's the big foam pieces used to insulate houses. And it's cheap - $11 for the whole board and you can get a couple of pictures out of it.

If you would like a sturdier option, I have also created a Giant Picture
using a piece of plywood as the backing - it was a higher cost for that
version.

I used a mat knife to cut the styrofoam. I've also found that an
electric knife (like what you use to carve a turkey) works great as well
- it gives a cleaner edge.

Now your board is ready to attach your picture.
This is where things went horribly wrong and I stopped taking pictures. Let me give you some advice:
--you can't spray paint Styrofoam! -- I guess this is pretty common knowledge, but no one told me. It eats away at the foam.
So I had to use the other half of my board - good thing it was so big. Instead of spray paint, just use craft paint to paint the edges black.
Fun or solid duct tape wrapped around the edge is another great option. FYI, there's a clear film, like saran wrap, over the foam - peel it off so the paint will work.
--don't use mod podge for flimsy paper! -- I had planned to use spray glue, but had lent it out and figured I'd just mod podge the board and set the picture on - bad idea. The mod podge was way to wet and cause the paper to wrinkle. Plus then when I tried to smooth it out it wrinkled more and more. Quite the disaster on their faces. So I had to throw that picture away. And trek back to make another copy (I'm sure they thought I was crazy)
So, lesson learned! Here are the recommended steps to mount the picture to the board:
---Use craft paint on the edges or duct tape. This will give your edge a finished look. If painting, let dry completely.
--Use spray glue (like Elmer's Spray Glue - in the craft section) to stick it down. It will make the photo tacky but not wet. I sprayed the whole board then had someone help me - one of us on each end of the big picture - slowly lower the picture onto the tacky board.
If you're worried about the spray on styrofoam, try spraying directly on the back of the picture. Then press it into place.
Want to know how we hung it on the wall - that info is in the final step.
I am sure there are several ways to hang up your photo. You could discreetly put a nail in each corner, or in the middle of the top and bottom (it's light so it won't need much) - that would be easy.
We used duct tape to hold loops of wire and hooked those over nails - super high-tech, only not :) A view of the back:

The wire has slipped out and needed retaped, so I might go with the nail method or get a less-slick wire.
Here's the view looking into their room - I love it, and so do they!!

It has been a year since I completed this project. The picture is still looking great, not fading, etc - I'll try to keep you posted as time goes on, so right now, so far so good.
No comments:
Post a Comment